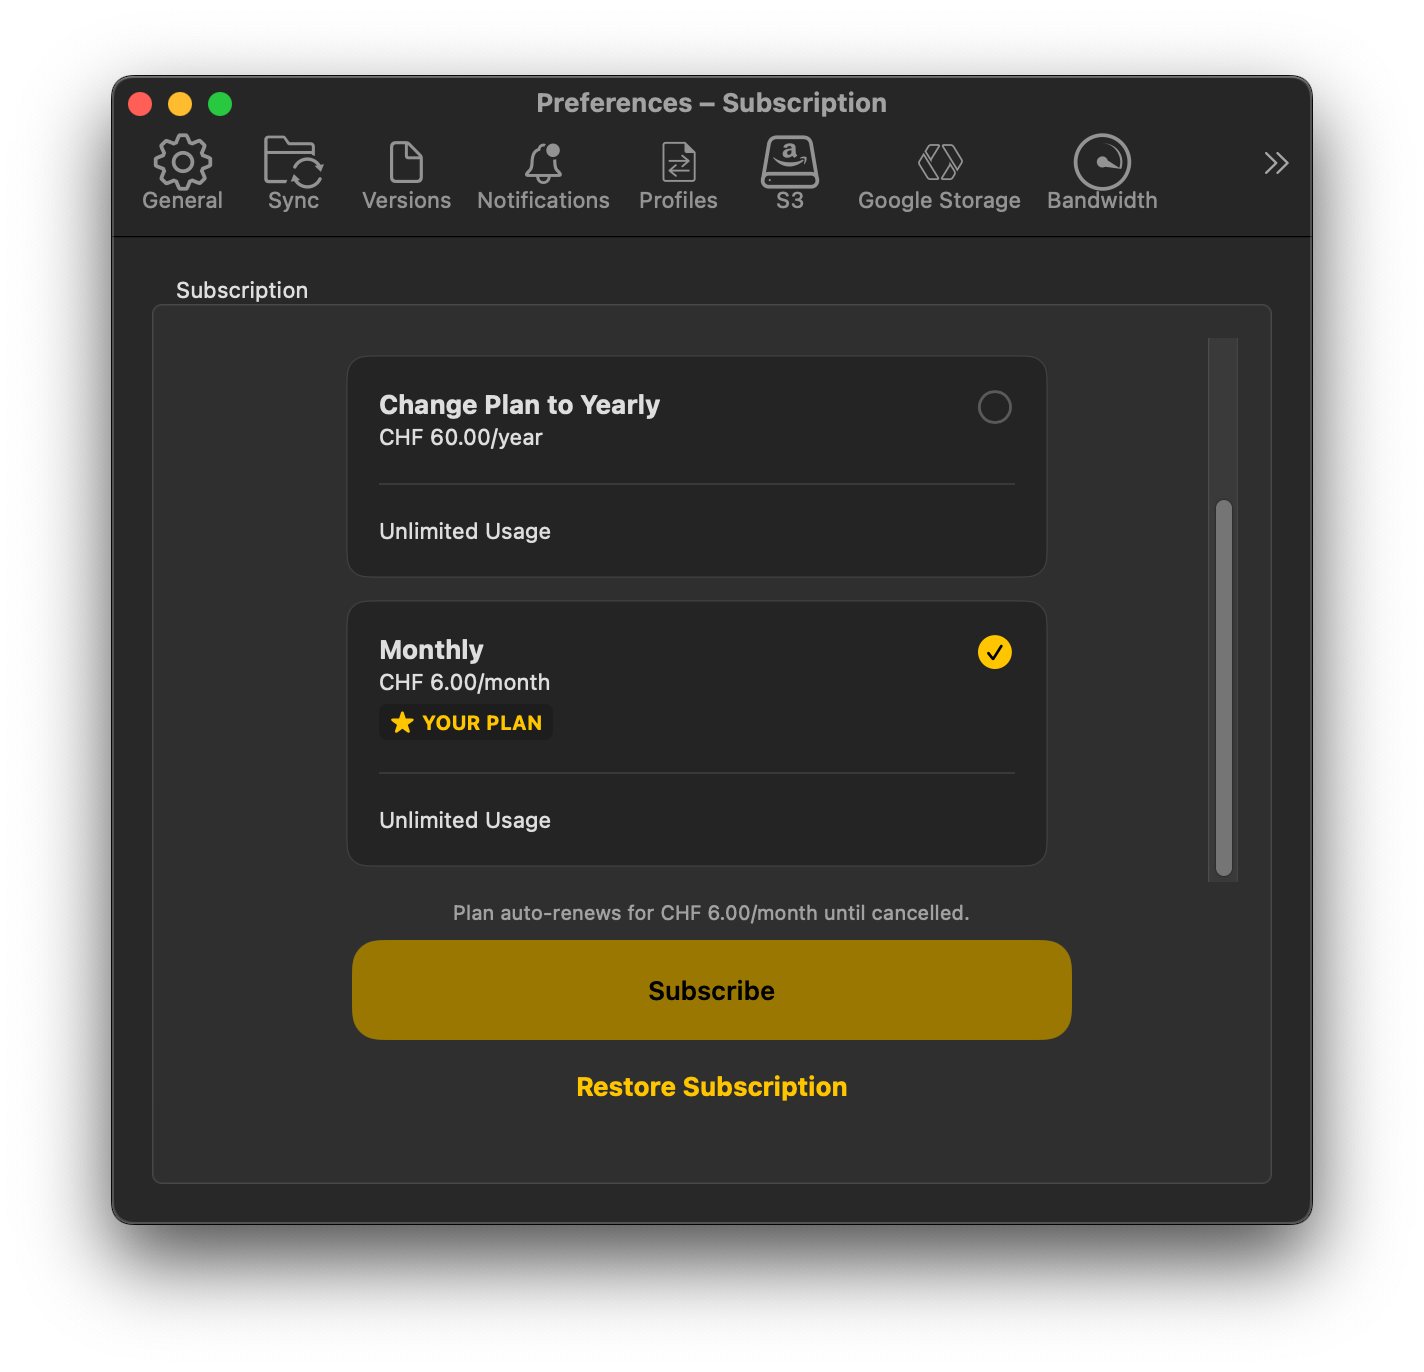
Version 5 is now available in the Mac App Store as a subscription instead of a perpetual license. If you previously purchased Mountain Duck in the Mac App Store, you are eligible to run version 5 with no limitations for up to one year after your purchase date before you are required to purchase a monthly or yearly subscription.
Unfortunately we cannot distribute version 4 any longer in the Mac App Store and it is not possible to support subscriptions through the Volume Purchase Program (VPP) in the Apple Business Manager or Apple School Manager. We advise to use a different solution to distribute software for users and switch to perpetual licensing we offer for Mountain Duck outside the Mac App Store.
The new application icon designed by Katharina Hagemann now comes in three variants for macOS 26 Tahoe including Dark and Mono variants. We have decided to make it squircled to fit into the new icon paradigma. The changes will be available in version 5.1.
New Status Bar Icons
Also the status bar icon in the status bar on macOS and the system tray on Windows as the main user interface to configure Mountain Duck has been revamped to visually fit better and show sync progress with rotating arrows.
We are thrilled to announce Mountain Duck 5, the premier choice to mount server and cloud storage as a disk in Finder on macOS and the File Explorer on Windows. Version 5 is a solid major upgrade in development for several years with many new features and refinements, including a new Integrated Connect Mode, storage-independent file versioning support, and SMB connections.
New Features
Integrated Connect Mode
Mountain Duck 5 features a new Integrated connect mode using native APIs on Windows & macOS to integrate in the file explorer. No device driver installation or network mount required. The connect mode delivers significantly faster file write performance and file operations that match the speed of local disk operations, and a user experience similar to OneDrive on Windows or iCloud Drive on macOS but with any cloud storage provider of your choice.
Windows Search and Spotlight on macOS can be used to search for files on remote storage in Integrated connect mode.
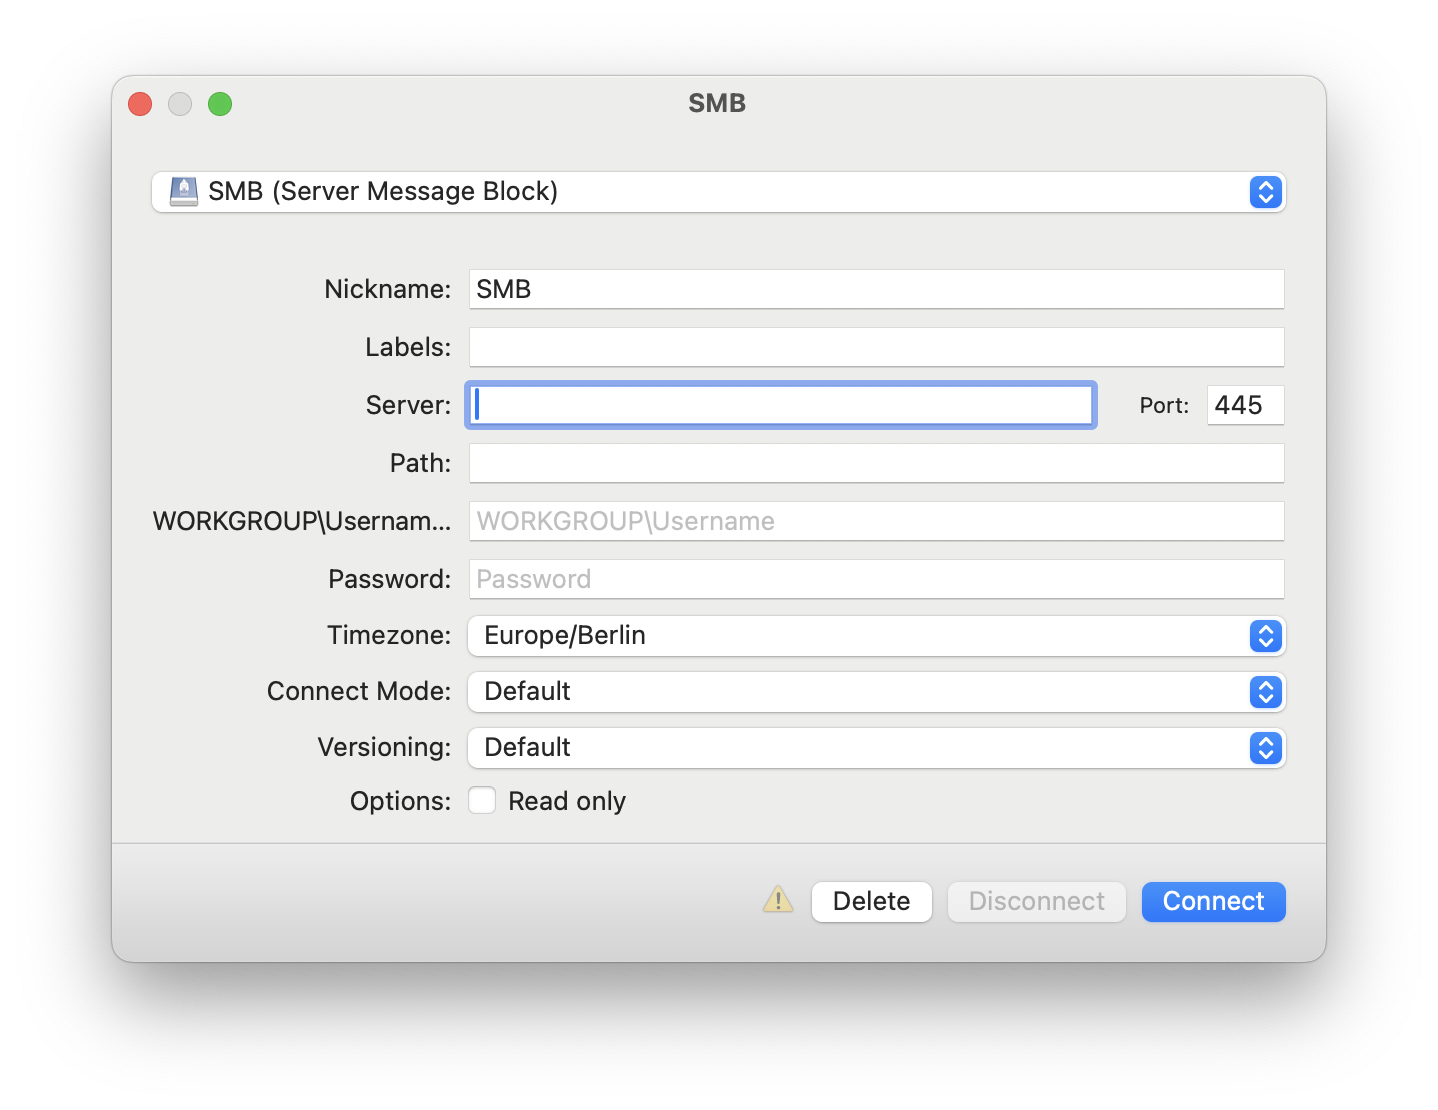
As already available in Cyberduck, Mountain Duck 5 expands its protocol support with the addition of SMB (Server Message Block), enabling seamless connectivity to Windows file shares, Linux Samba, macOS File Sharing & Azure File Shares.
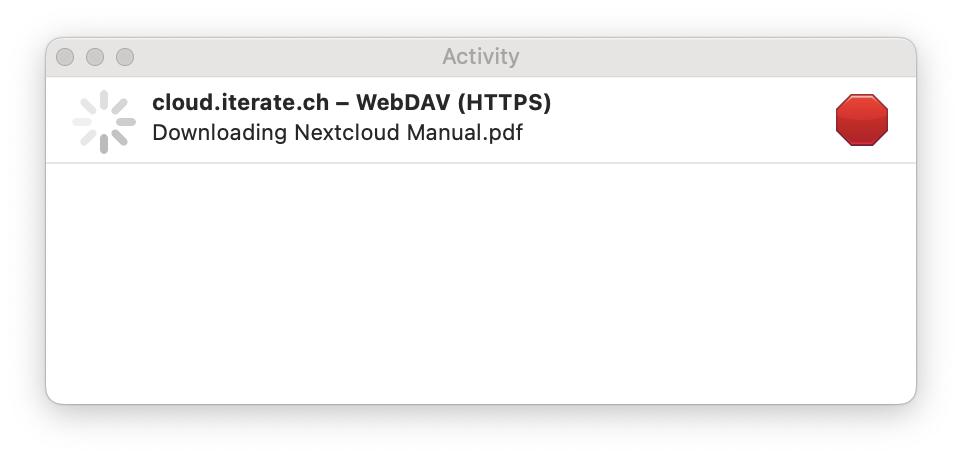
Track and cancel currently running sync operations in the new Activity panel available from the status bar (macOS) or tray (Windows) menu. It shows all running operations on files, pending sync tasks as well as any pending mount process.
Custom Versioning
The new Custom Versioning feature allows to safeguard and restore previous file versions. The previous version is stashed away before overwriting a file.
The option is available for all protocols with no support of file versioning such as FTP, SFTP or WebDAV ensuring your files are protected with version history regardless of the underlying storage protocol. File versions can be view and restored in the Info window.
Version 5 is the first paid upgrade after version 4 debuted in June 2020 with 17 free minor updates released since. Users with a license for version 4 receive an upgrade discount between 20% to 100%.
The new Integrated connect mode in Mountain Duck 5 synchronizes files and folders from a directory on the local disk with support from macOS and Windows.
While the Onlineand Smart Synchronizationmodes use device driver on Windows and NFS on macOS respectively to mount connections, the Integrated mode uses the tightly integrated File Provider (macOS) and Cloud Files (Windows) APIs to sync files from regular folder on the local disk like iCloud or OneDrive does. It allows faster writing and copy processes and access to cached content when offline.
Synchronization
The usage of dedicated operating system features for syncing make Mountain Duck 5 future proof. Like in Smart Synchronization connect mode, files are displayed as placeholders, cached on local disk and optionally selected to always keep offline.
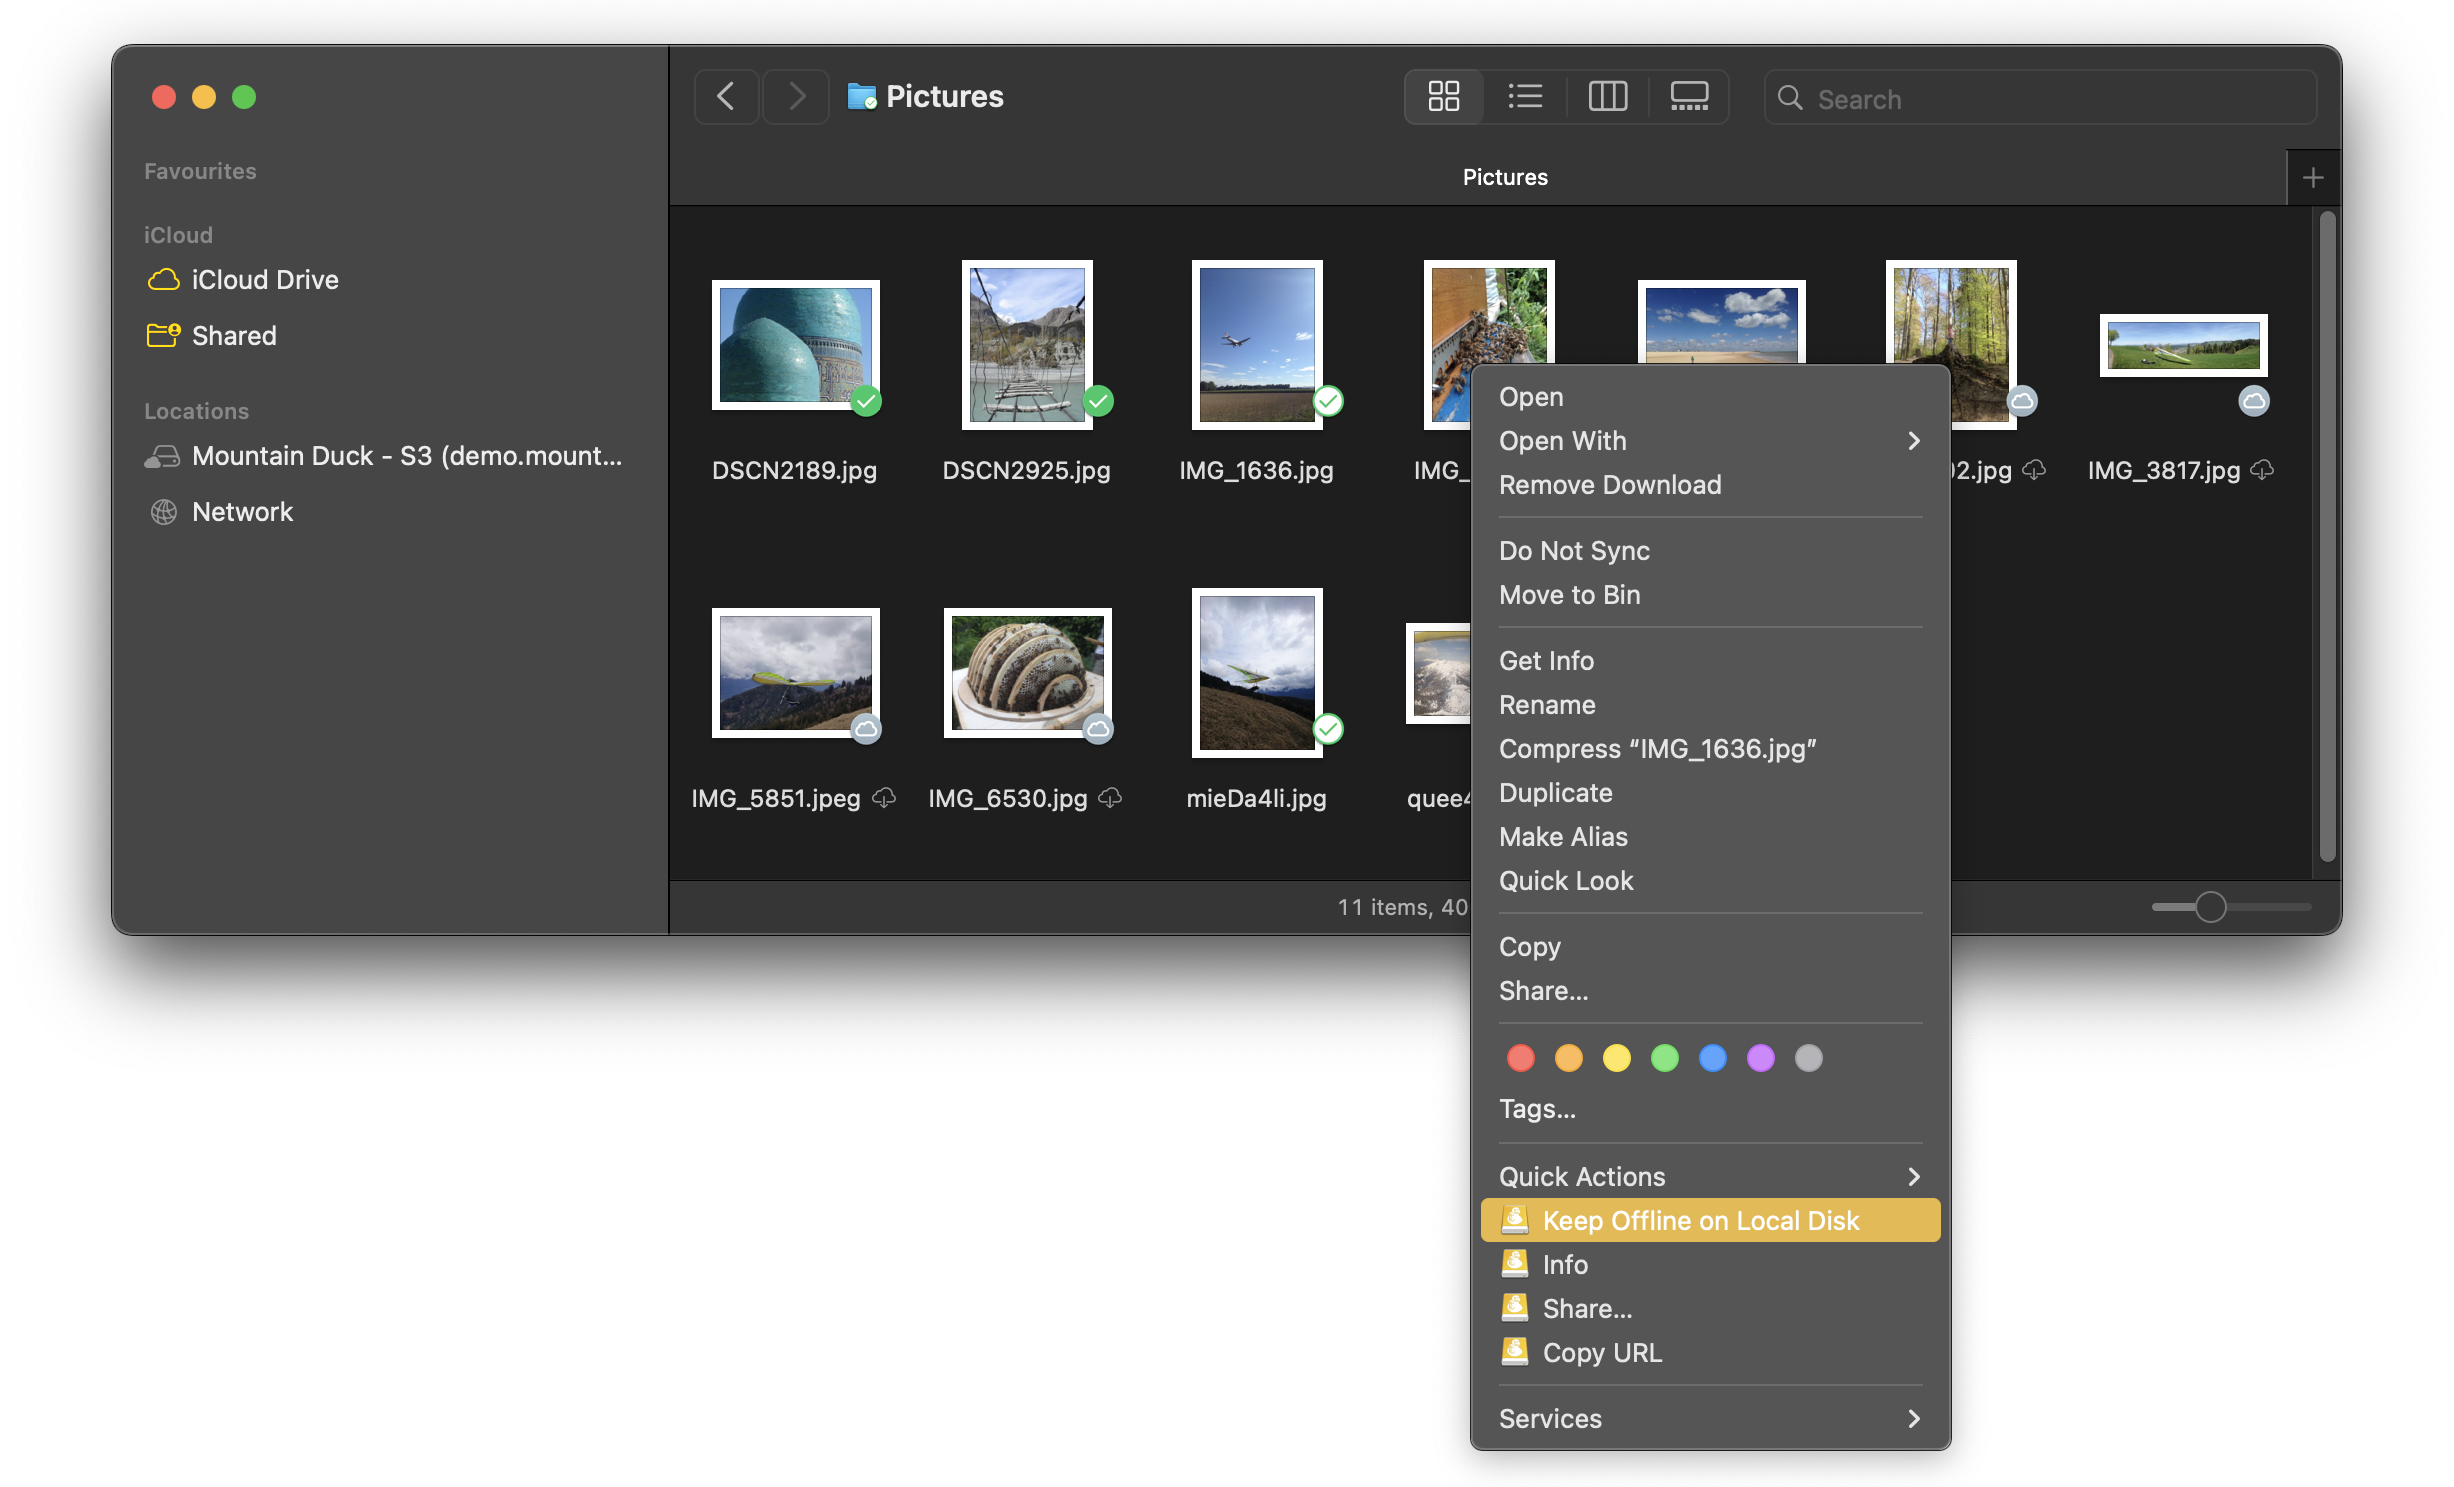
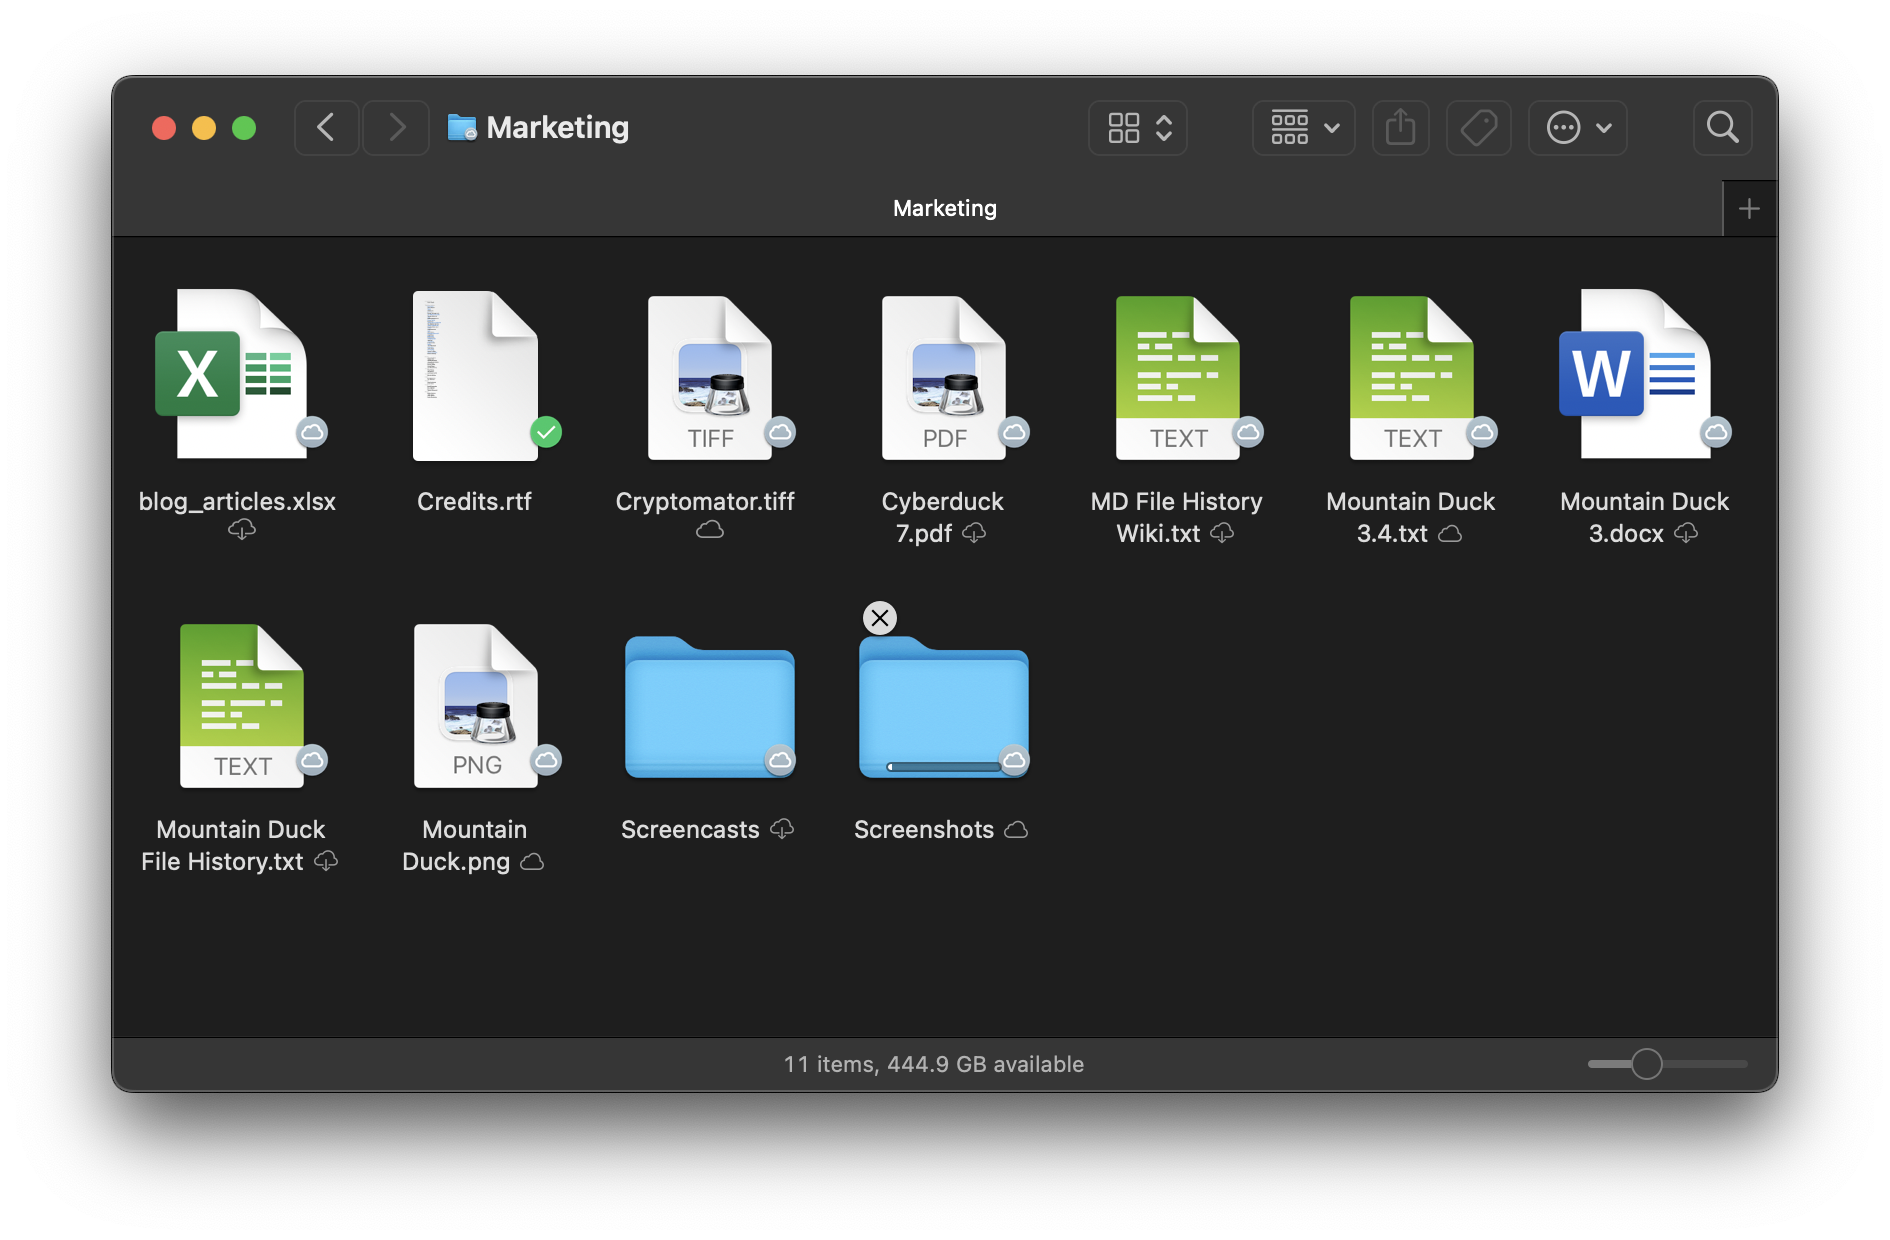
The improved user experience includes familiar file management controls directly within Finder and Windows Explorer, allowing users to easily select files to keep offline, remove cached data, or exclude items from synchronization. Visual indicators provide instant feedback on synchronization status through additional icons displayed next to filenames. Real-time progress is shown during file transfers with progress bars over file icons and circular progress indicators, giving users complete visibility into upload and download operations.
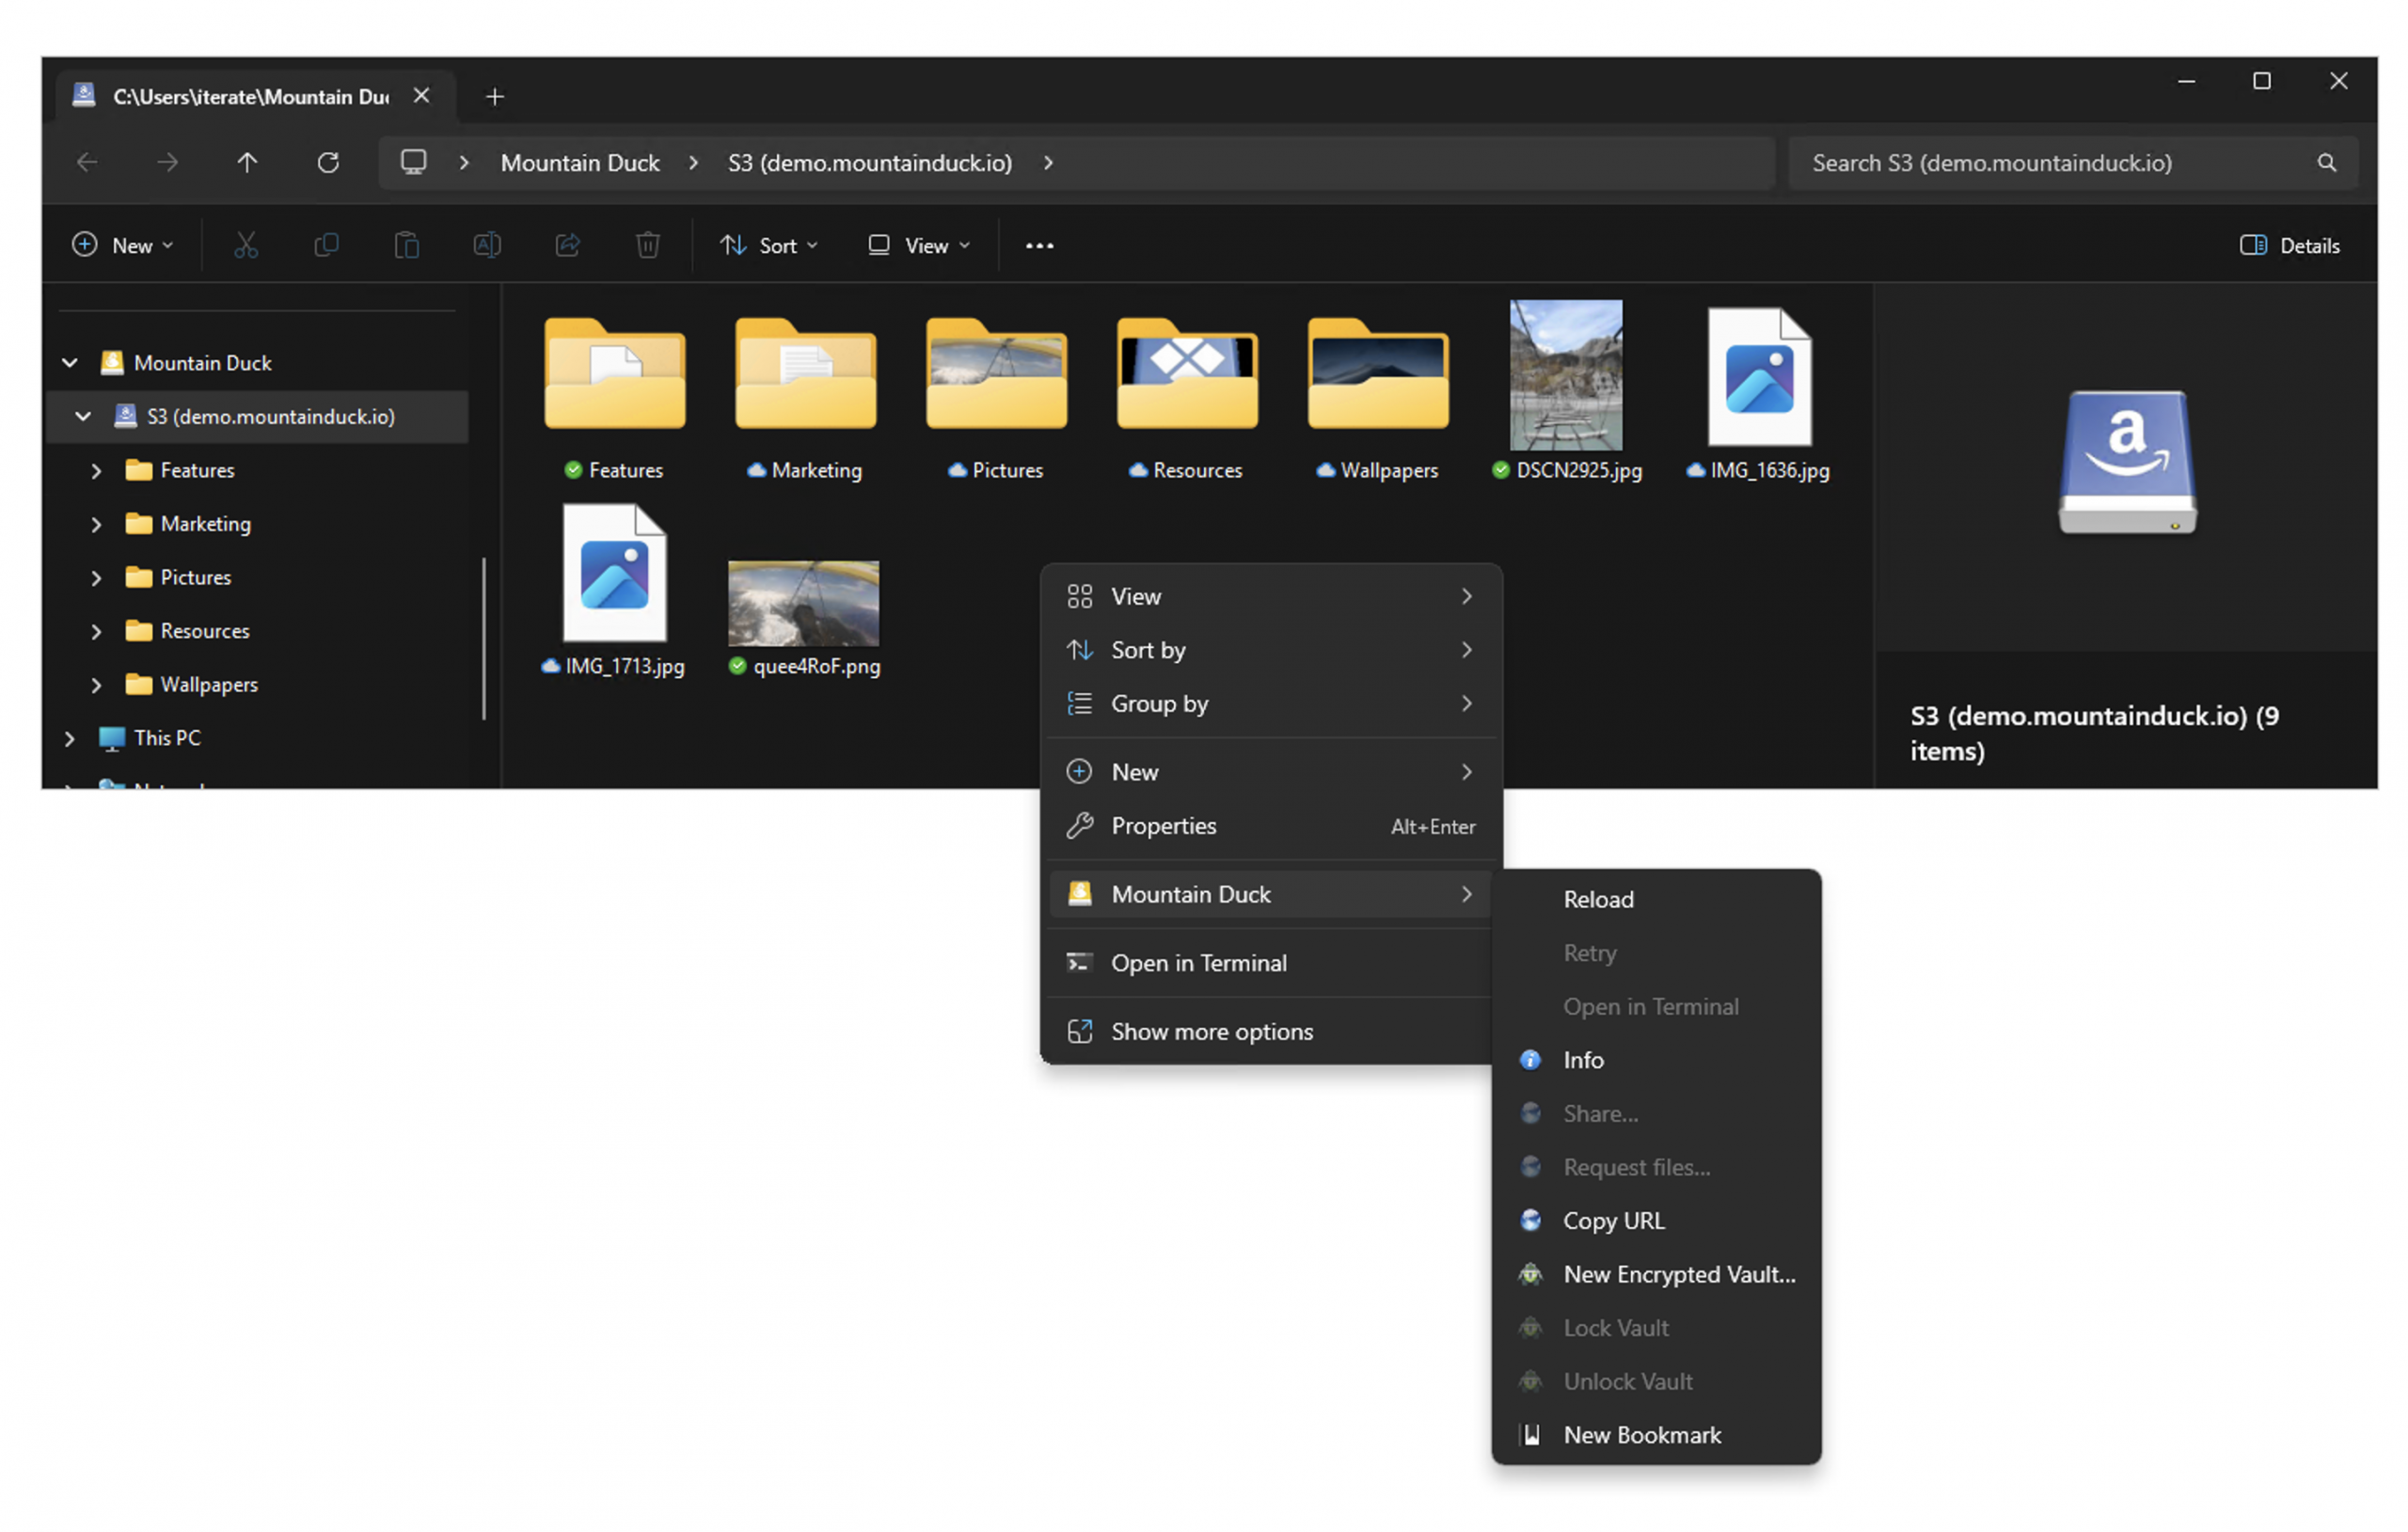
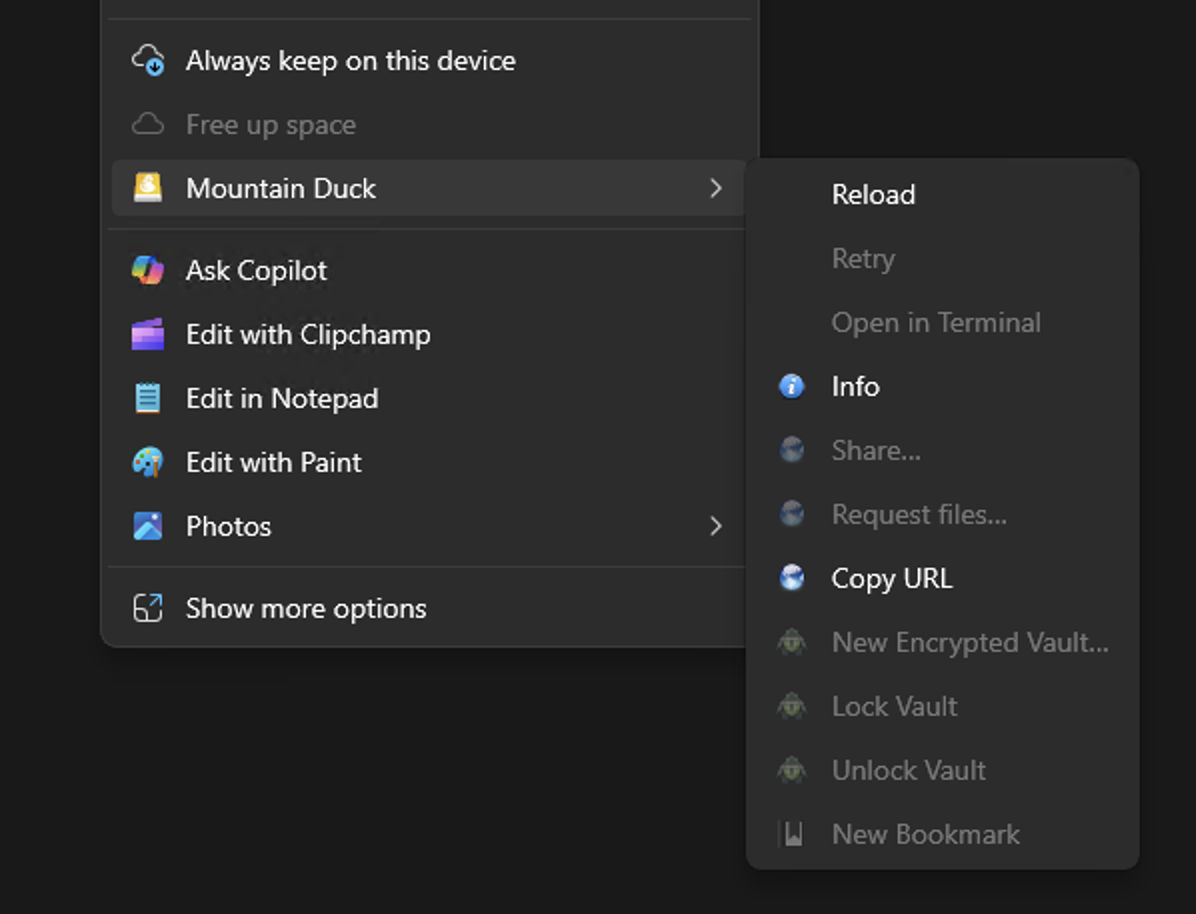
Additional Context Menu Items
Additional context menu items in Windows Explorer and Finder.app on macOS provided by the system allow to download files or free up space for files already cached.
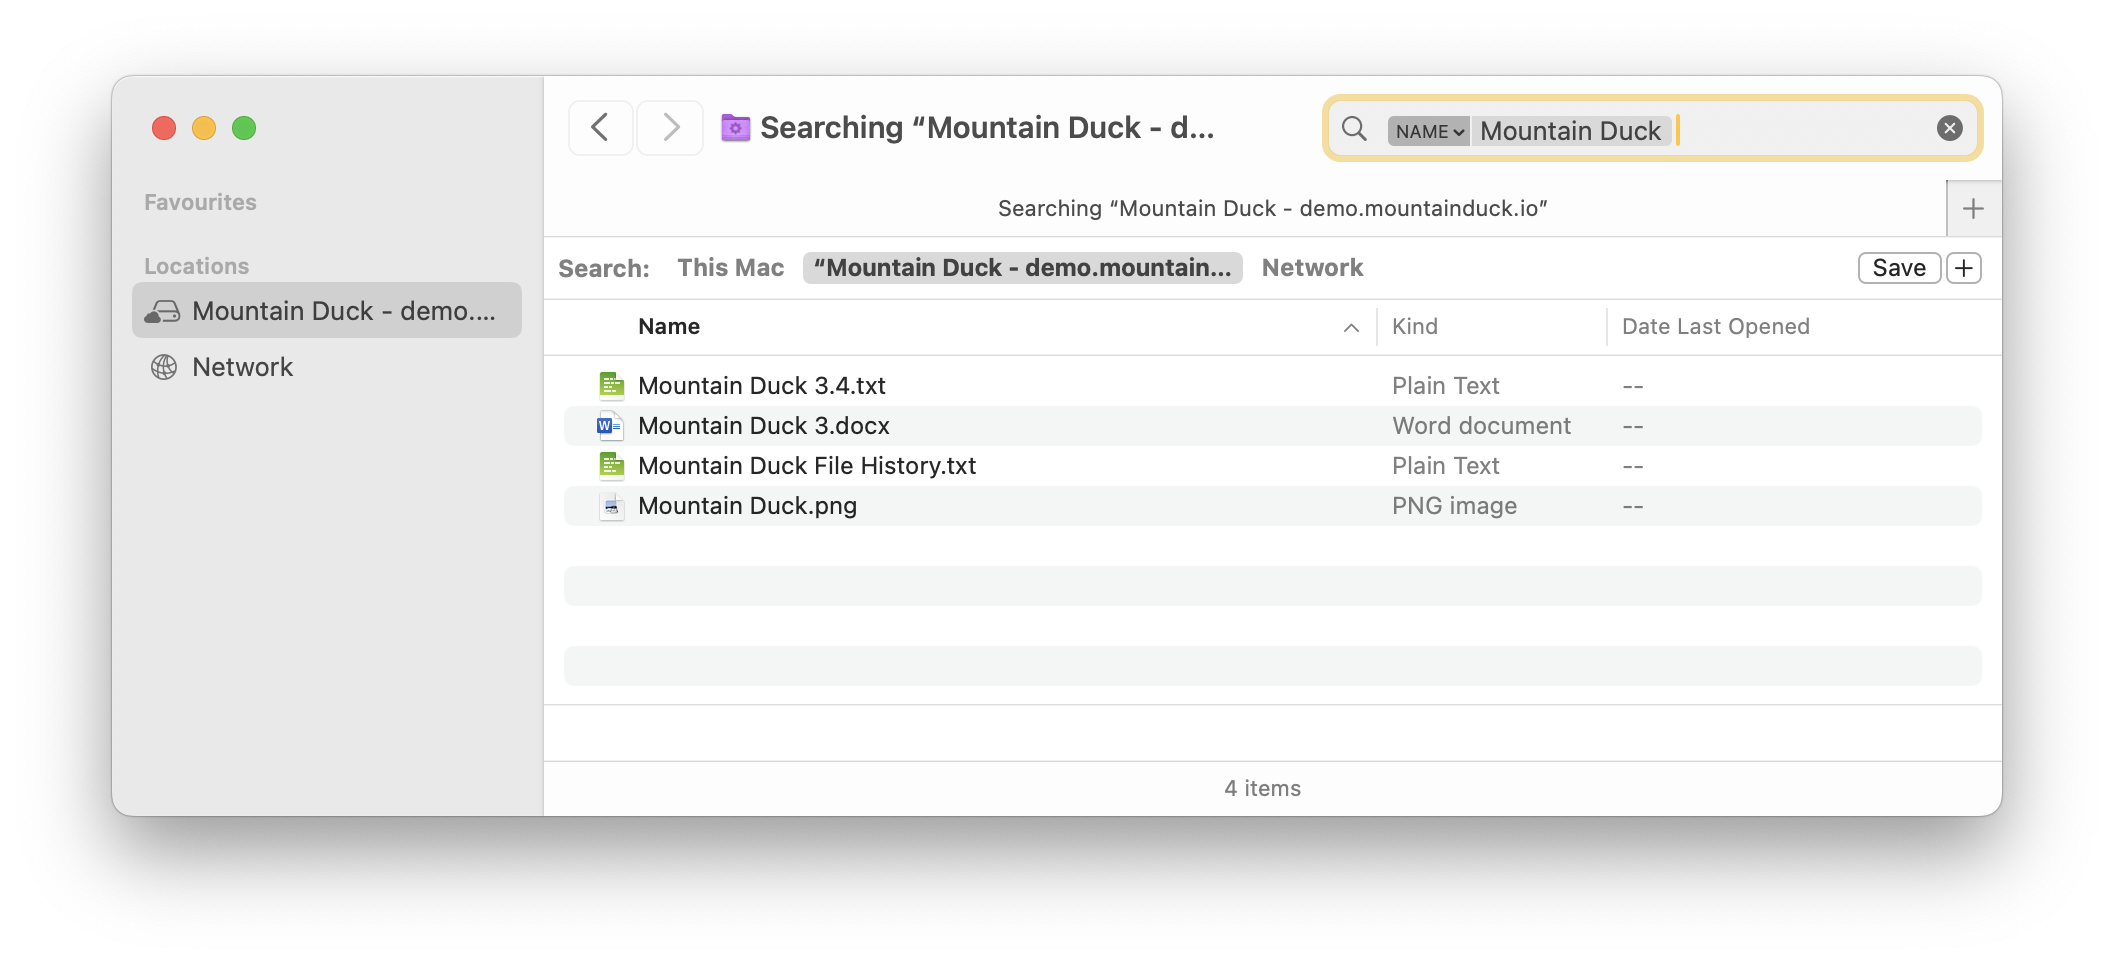
Spotlight
Windows Search and Spotlight on macOS can be used to search for files on remote storage in Integrated connect mode.
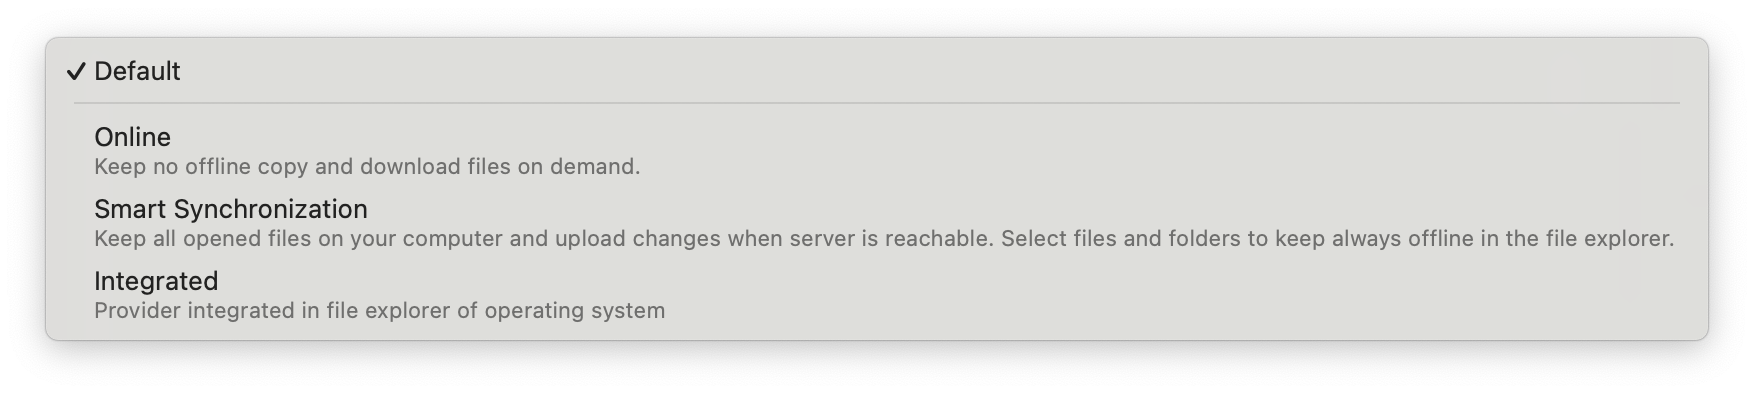
New Default
The Integrated connect mode is the default for new connections configured. Existing bookmarks retain the connect mode when an existing cache location is found.
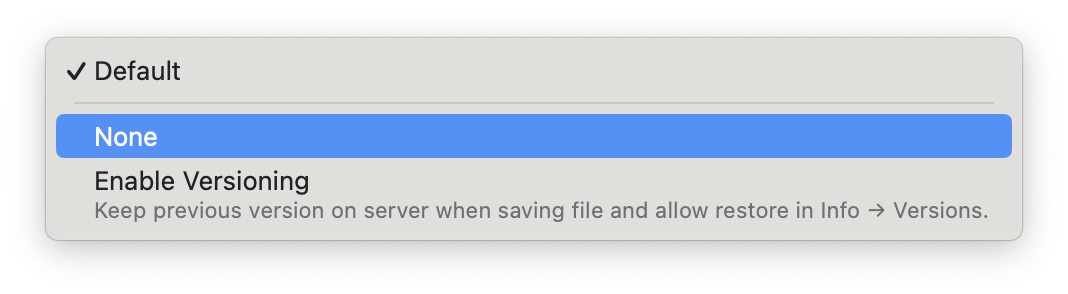
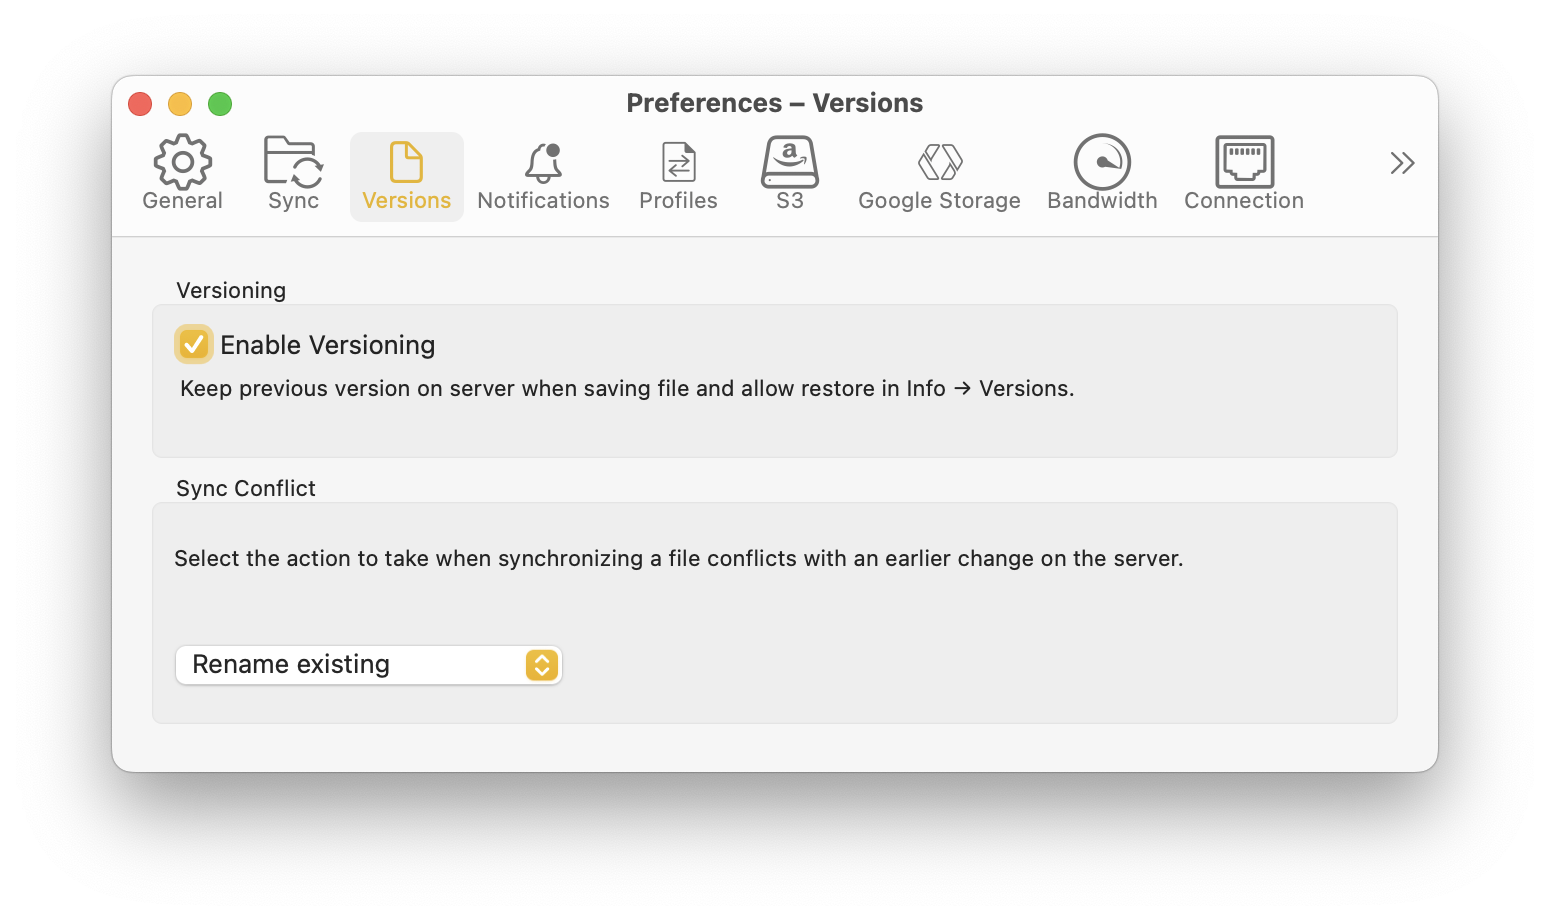
With Mountain Duck 5, a new storage-independent versioning option is introduced for protocols with no support for file versioning such as FTP/SFTP, WebDAV, and OpenStack Swift. Safeguard against potential file loss with custom versioning. Stash changes to a file in a versioned folder on the server.
The custom versioning option can be enabled in the bookmark configuration or by default in Preferences → Versions tab.
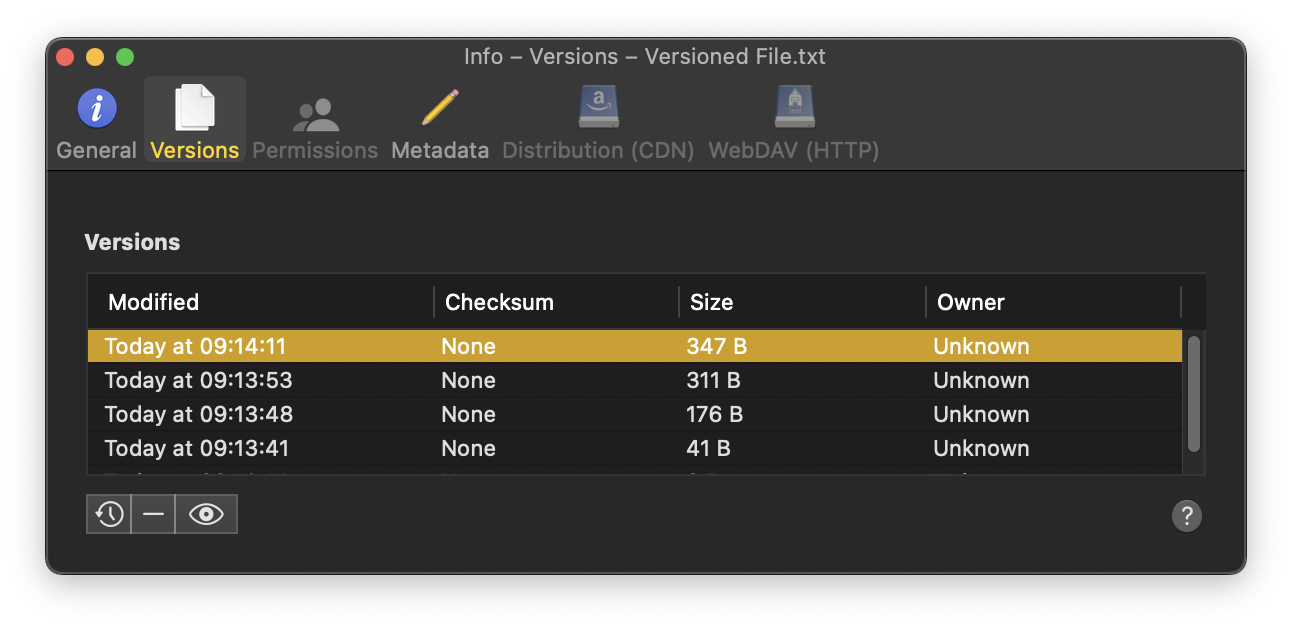
Use the context menu Info → Versions to retrieve the file history where previous versions can be previewed, deleted or restored. Alternatively manage previous versions stored in the folder named .duckversions adjacent to the file.
More information on the settings can be found in the documentation.
Get a sneak peek at upcoming Mountain Duck 5. Features new Integrated connect mode using native APIs on Windows & macOS to integrate in the file explorer. No device driver installation or network mount required. The connect mode allows to sync files like OneDrive on Windows or iCloud Drive on macOS using the cloud storage provider of your choice. All major protocols are supported to connect to just about any server you want with SMB added as an additional option in version 5.
The new connect mode benefits from faster file write performance and file operations in general on par with operations on local disk. Local storage is managed by the operating system. The mount is not seen as a remote volume by applications but as a regular folder on disk and can be accessed when offline. You will find familiar user interface in Finder and Windows Explorer to select files to keep offline, remove cached data on disk or exclude from sync. An additional icon provided next to the filename is displayed indicating the synchronization status. Additionally, progress is shown when downloading or uploading a file with a progress bar over the file icon or circular progress indicator adjacent the filename. Windows Search and Spotlight on macOS can be used to search for files.
Choose Preferences → Update → Beta → Check for Update… in the Mountain Duck status bar menu to update. The build can be used with a validation registration key for version 4 while in beta.
To access Google Drive or Google Cloud Storage using Cyberduck or Mountain Duck we have registered an OAuth 2.0 Client ID with Google that is required to show users a consent screen to access files from these cloud storage services using the respective APIs.
Google recently blocked the consent screen and now shows the following error when trying to open a new connection:
This app tried to access sensitive info in your Google Account. To keep your account safe, Google blocked this access.
We are aware of the problem and are currently working on getting the consent screen re-approved by Google.
No user data is collected or shared when you access your data in Google Drive or Google Cloud Storage using Cyberduck or Mountain duck. We do not transfer or disclose your information to third parties. Any data accessed is processed solely on your device.
Cyberduck 9 adds a new custom file versioning feature for protocols with no native versioning support, such as FTP/SFTP and WebDAV.
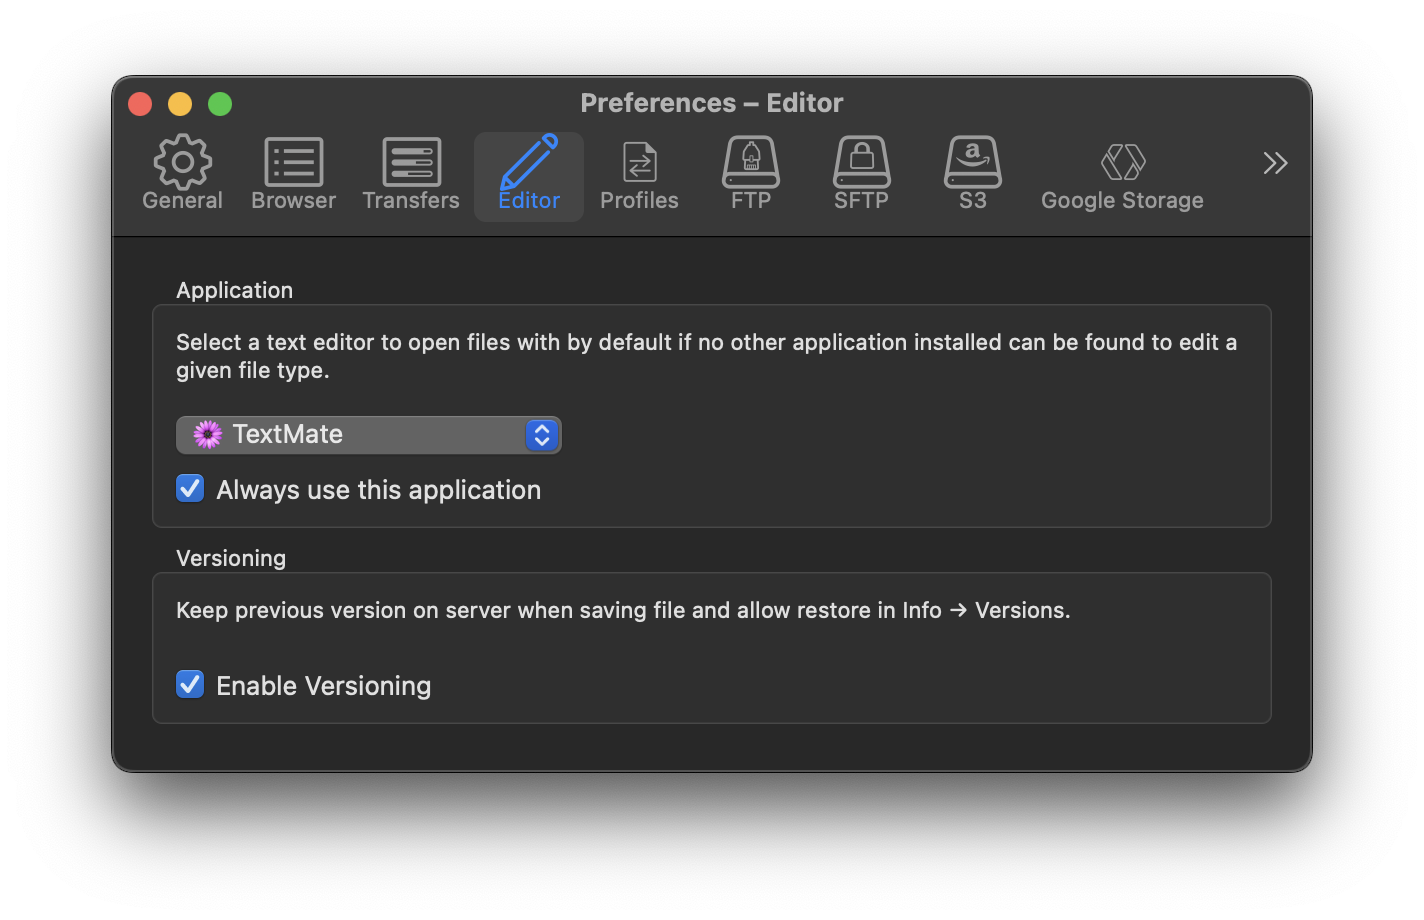
The feature is added as a security measure to reduce the risk of file loss when editing changes. You can enable the option by default in the Editor tab in Preferences.
The versions can be previewed, deleted or restored in Edit →Info →Versions with the same user interface as when working with revisions from protocols with native versioning support such as a versioned bucket in S3.
Technically instead of overwriting files, previous versions are moved to a folder named .duckversions created adjacent to the edited file. The documentation has more details.
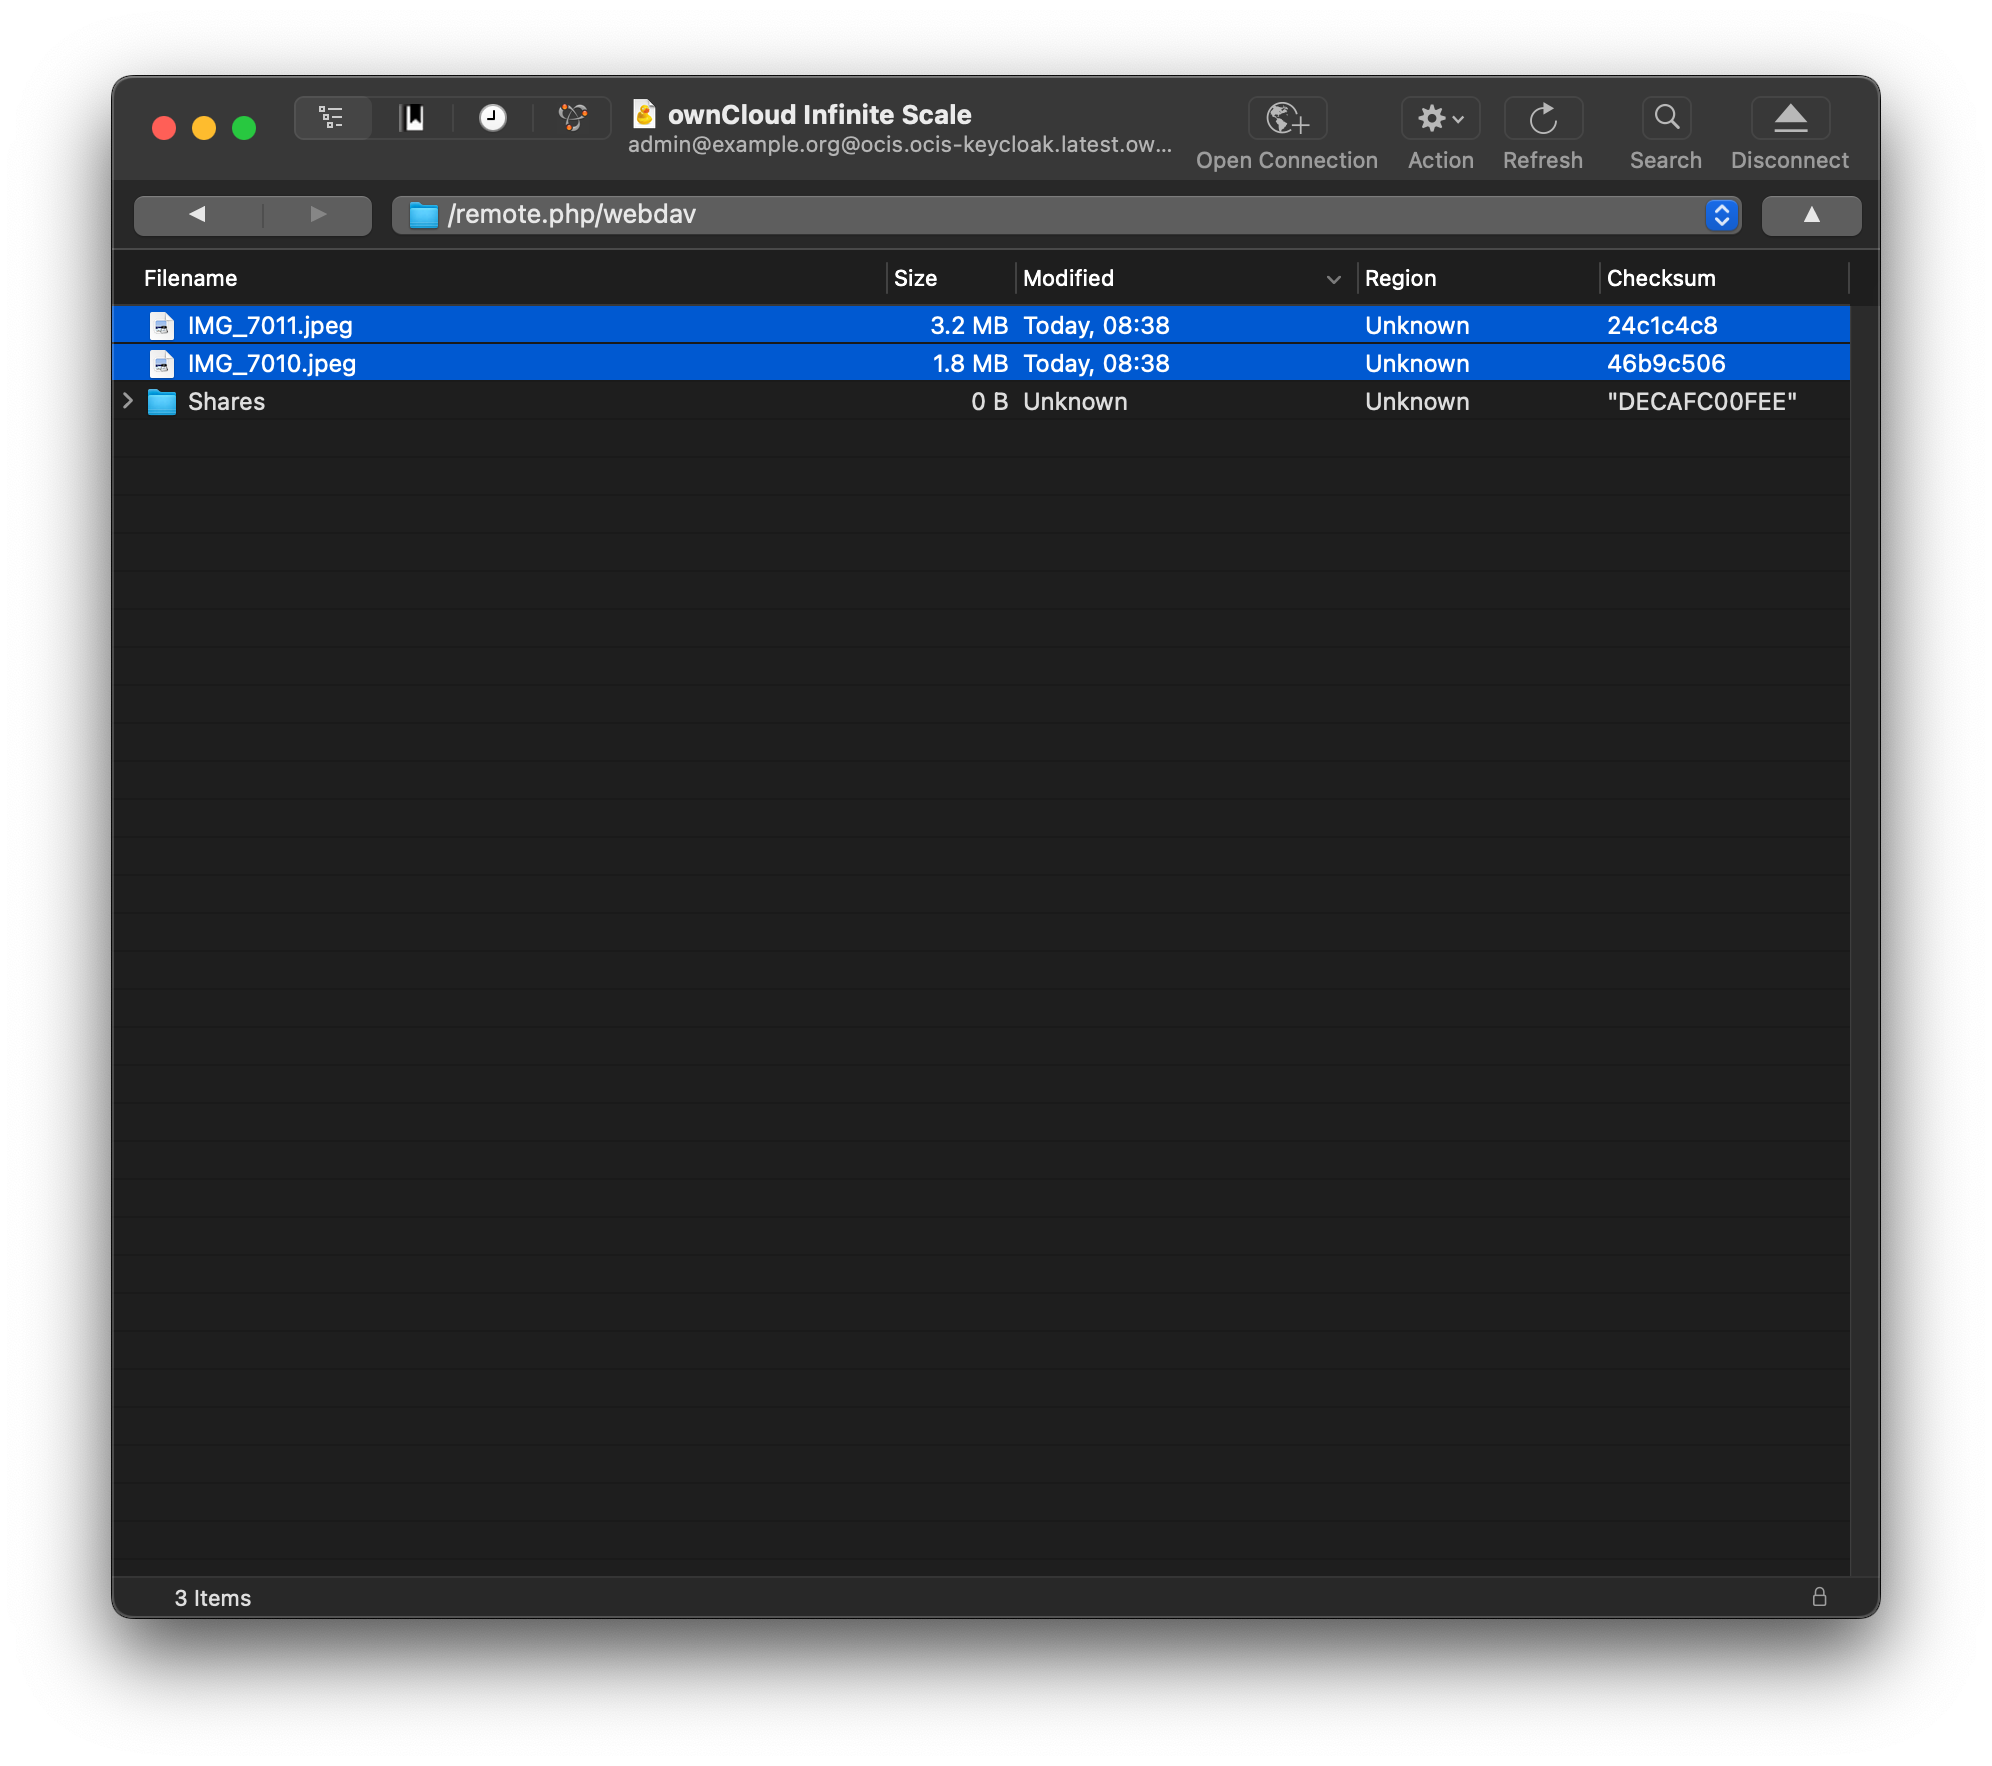
ownCloud Infinite Scale is a user-centric, cloud-native, open source, file sharing and collaboration platform that offers infinite scalability and enables complete digital sovereignty.
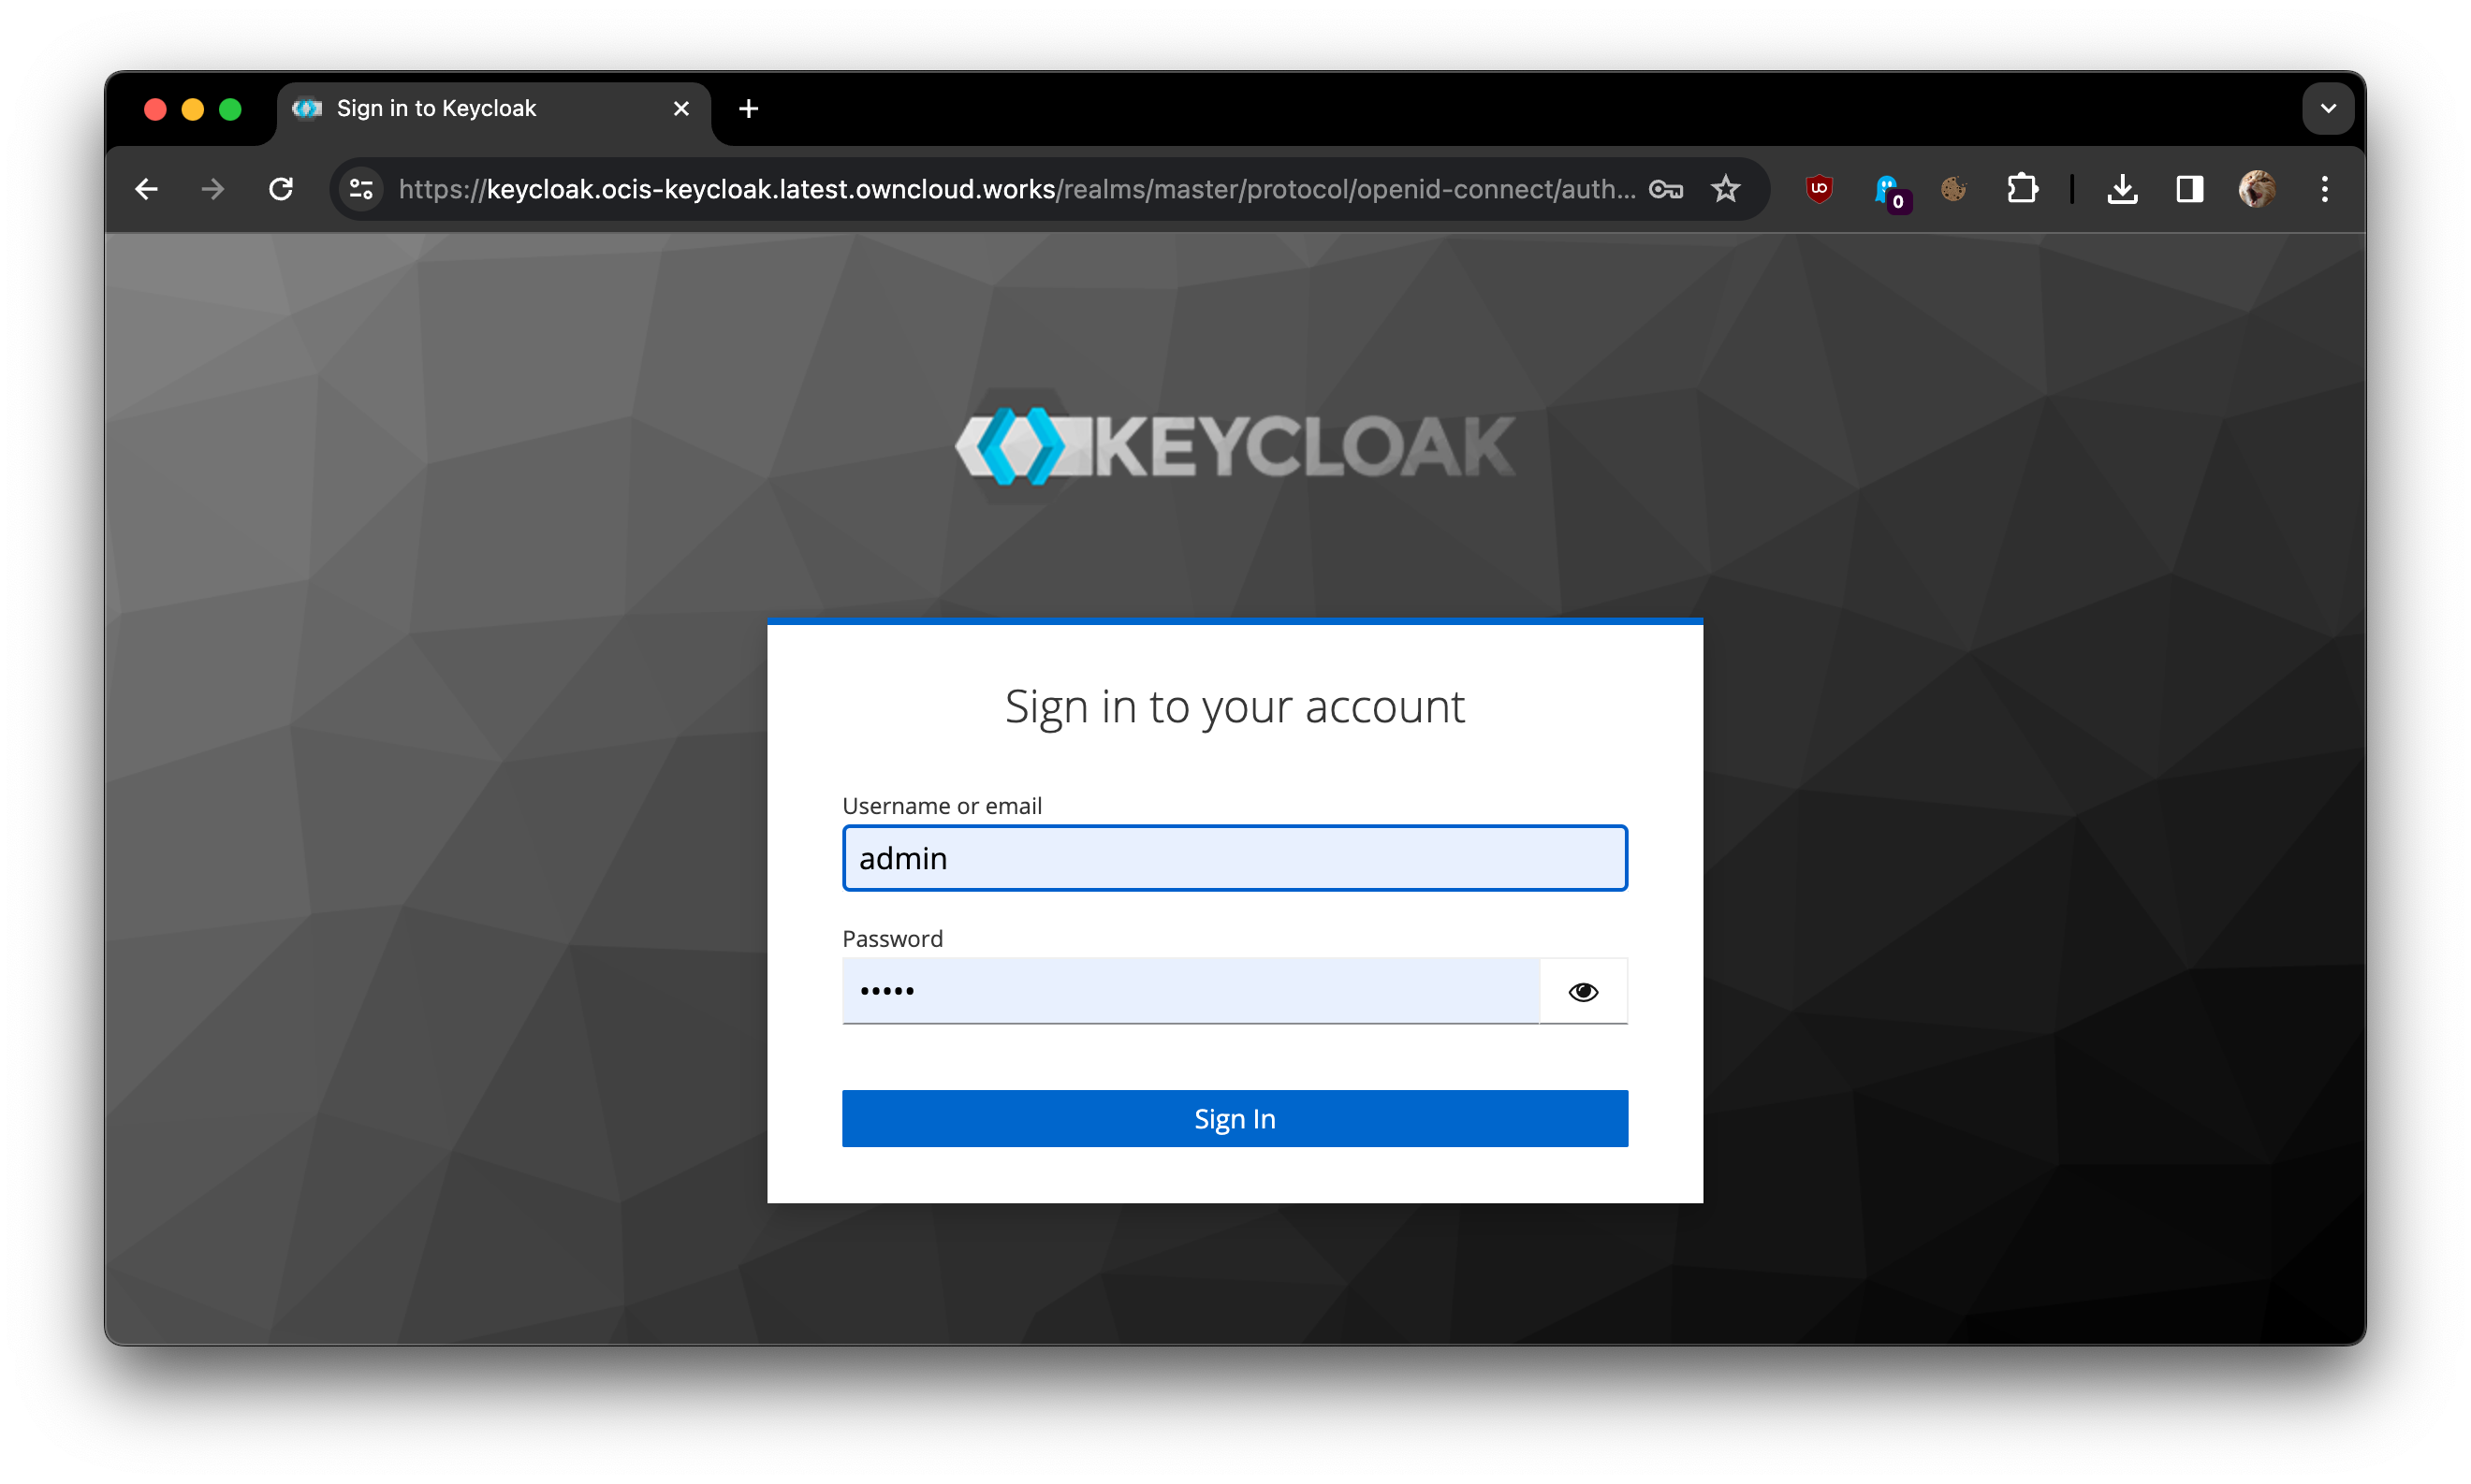
ownCloud Infinite Scale uses federated authentication with Keycloak as the identity provider by default. To connect using Cyberduck or Mountain Duck.
We will provide sample steps to connect to ownCloud Infinite Scale (oCIS) using OAuth 2.0/OpenID Connect (OIDC). It requires the client registration in the identity provider in ownCloud and a custom connection profile for Cyberduck & Mountain Duck. To allow to test this without a custom deployment, the sample makes use of the public instance running at ocis.ocis-keycloak.latest.owncloud.works with the identity provider at keycloak.ocis-keycloak.latest.owncloud.works. You can login with the username “admin” and password “admin”. Note that these demo instances are wiped periodically and all data and configuration is temporarily available only.
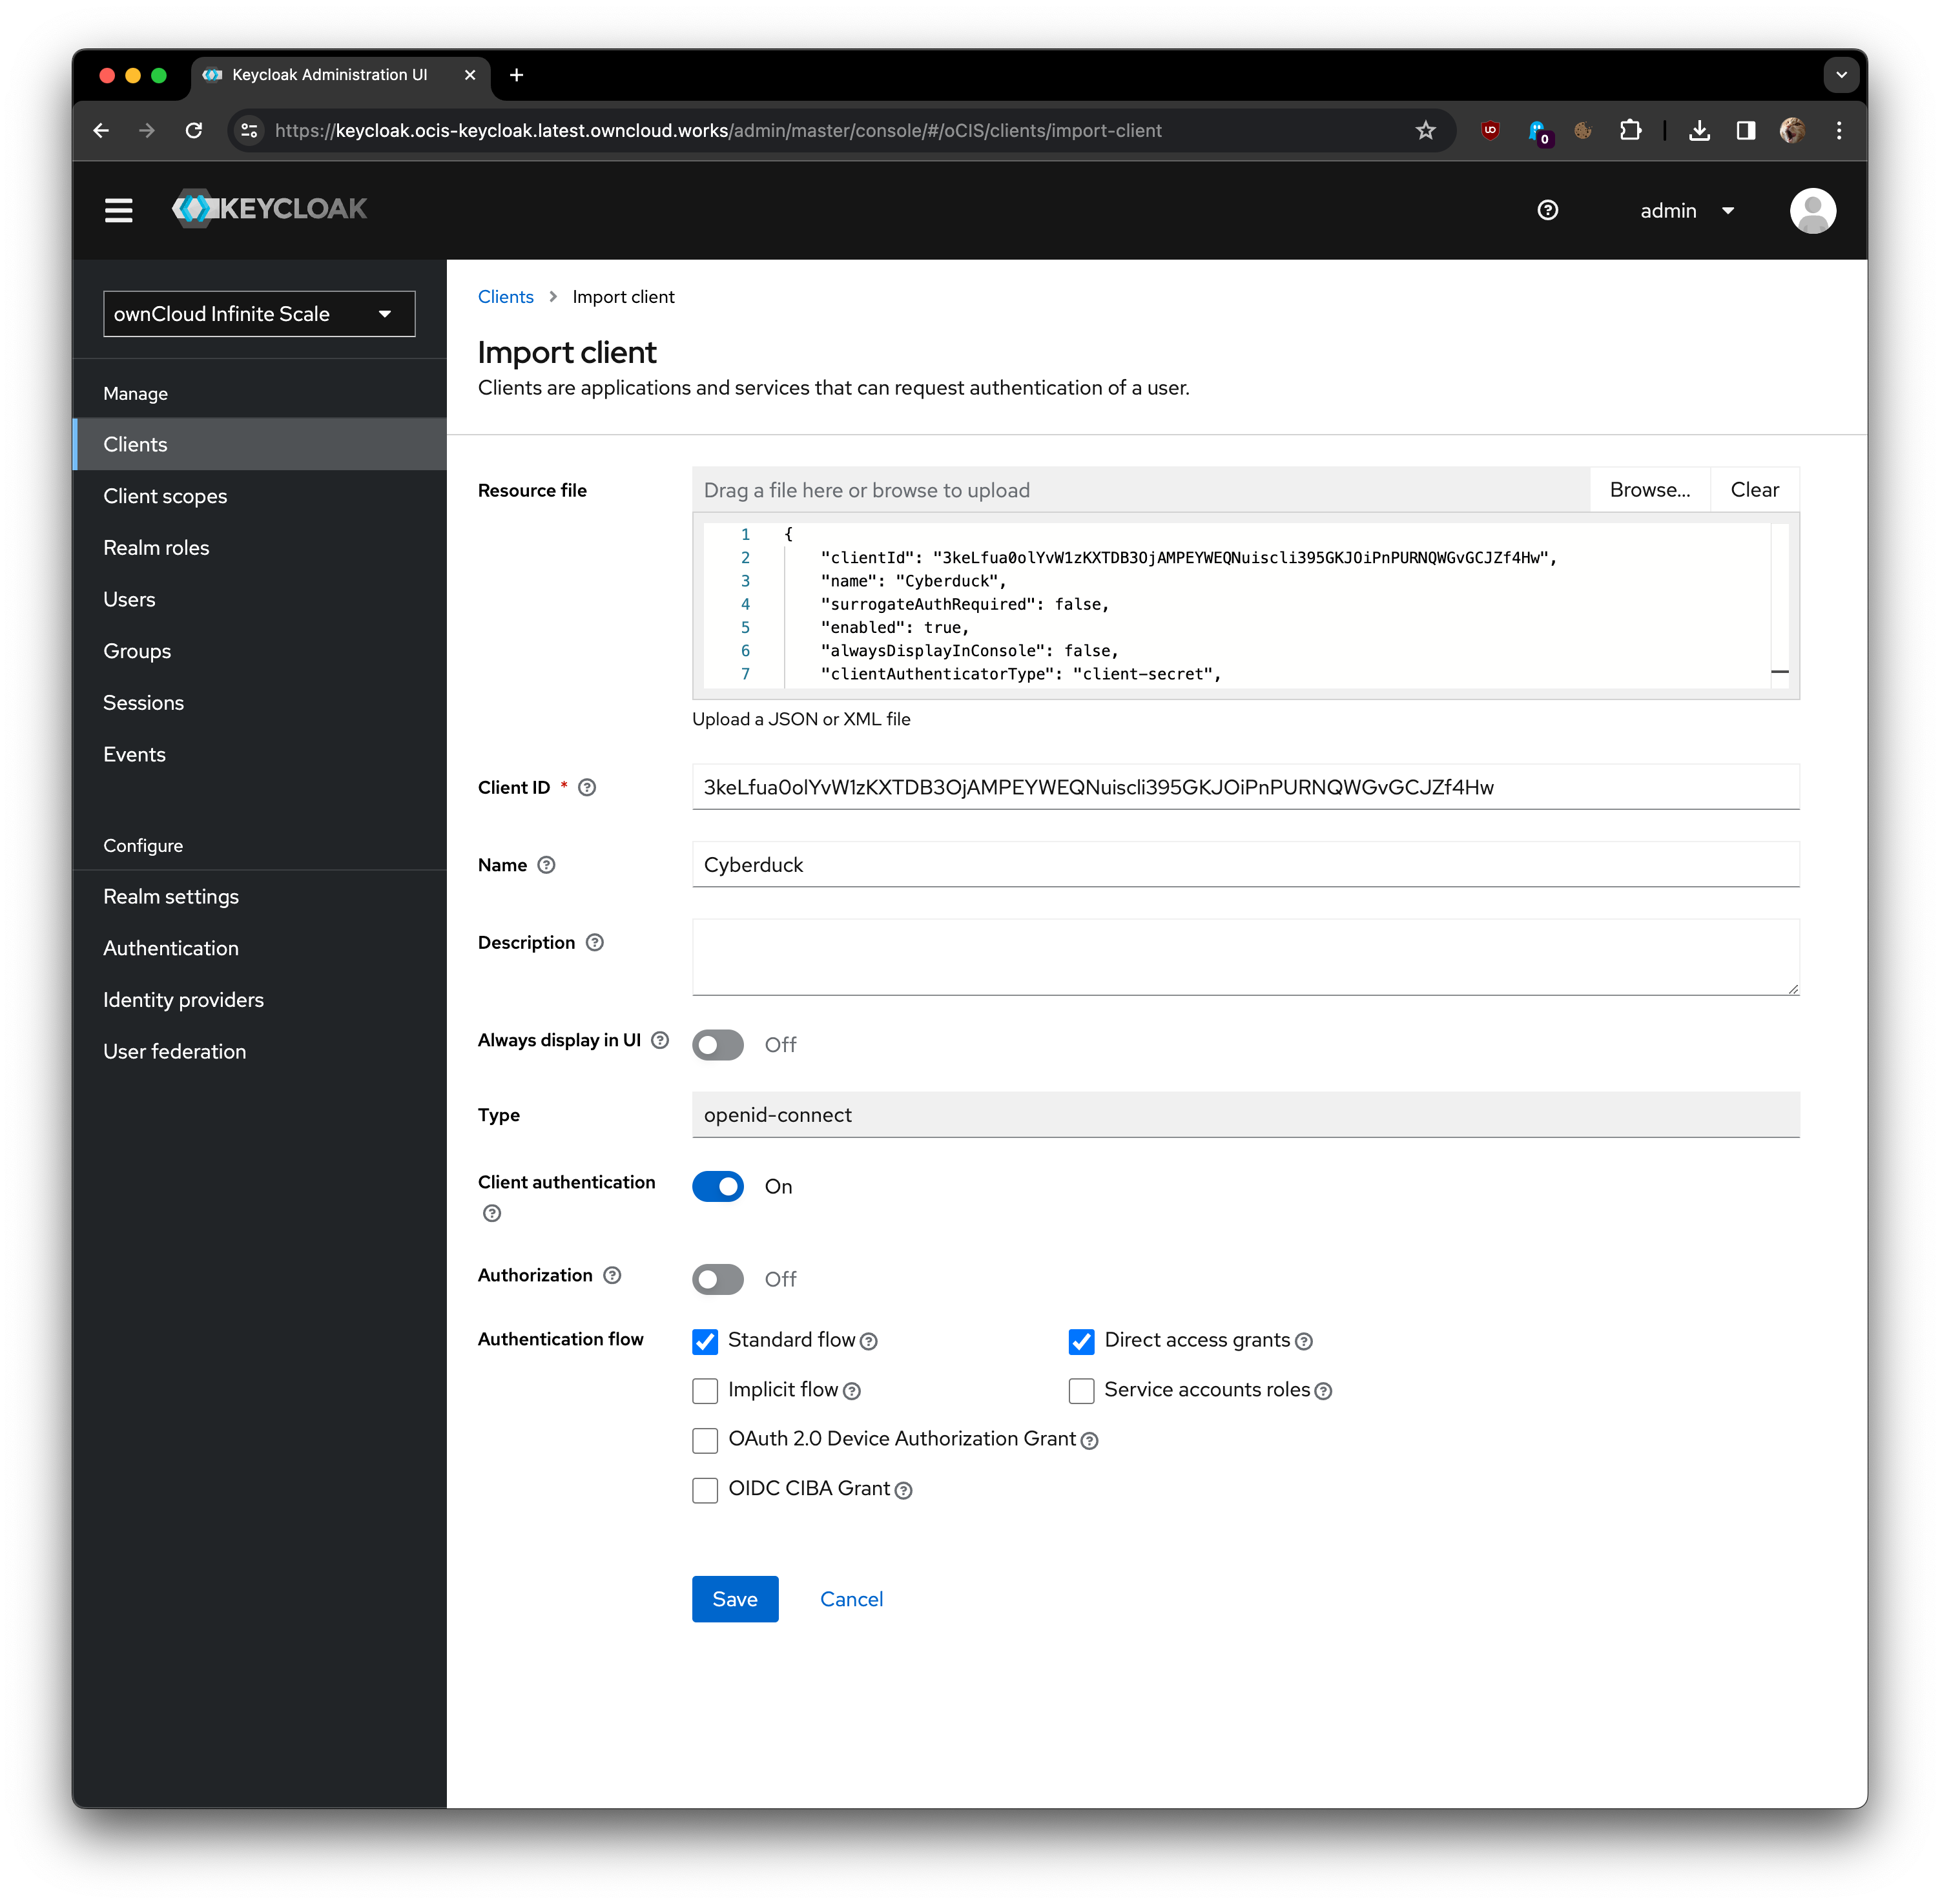
Import client configuration
You will need to import a client configuration for Keycloak to allow OAuth authentications from Cyberduck & Mountain Duck. The configuration registers a OAuth Client ID with the redirect URIs x-cyberduck-action:oauth and x-mountainduck-action:oauth set to allow a seamless login integration.
Connection Profile
The connection profile defines the custom OAuth Client ID to be used to connect to ownCloud including the authorization and token URLs used for authentication with the Keycloak identity provider. The connection profile matching the above client registration is
Save the file with the suffix .cyberduckprofile and double click to install and register with Cyberduck & Mountain Duck. This will enable the protocol option ownCloud Infinite Scale in the bookmark configuration.
The latest versions of Cyberduck & Mountain Duck now allow to connect to S3 by authenticating with an OpenID Connect (OIDC) identity provider.
Connections to S3 with web identity federation use AWS Security Token Service (STS) API to obtain temporary security credentials to authenticate with S3.
With web identity federation, you don’t need to (…) manage your own user identities. Instead, users of your app can sign in using a well-known external OpenID Connect (OIDC)-compatible IdP. They can receive an authentication token, and then exchange that token for temporary security credentials in AWS that map to an IAM role with permissions to use the resources in your AWS account. Using an IdP helps you keep your AWS account secure, because you don’t users to have long-term security credentials.
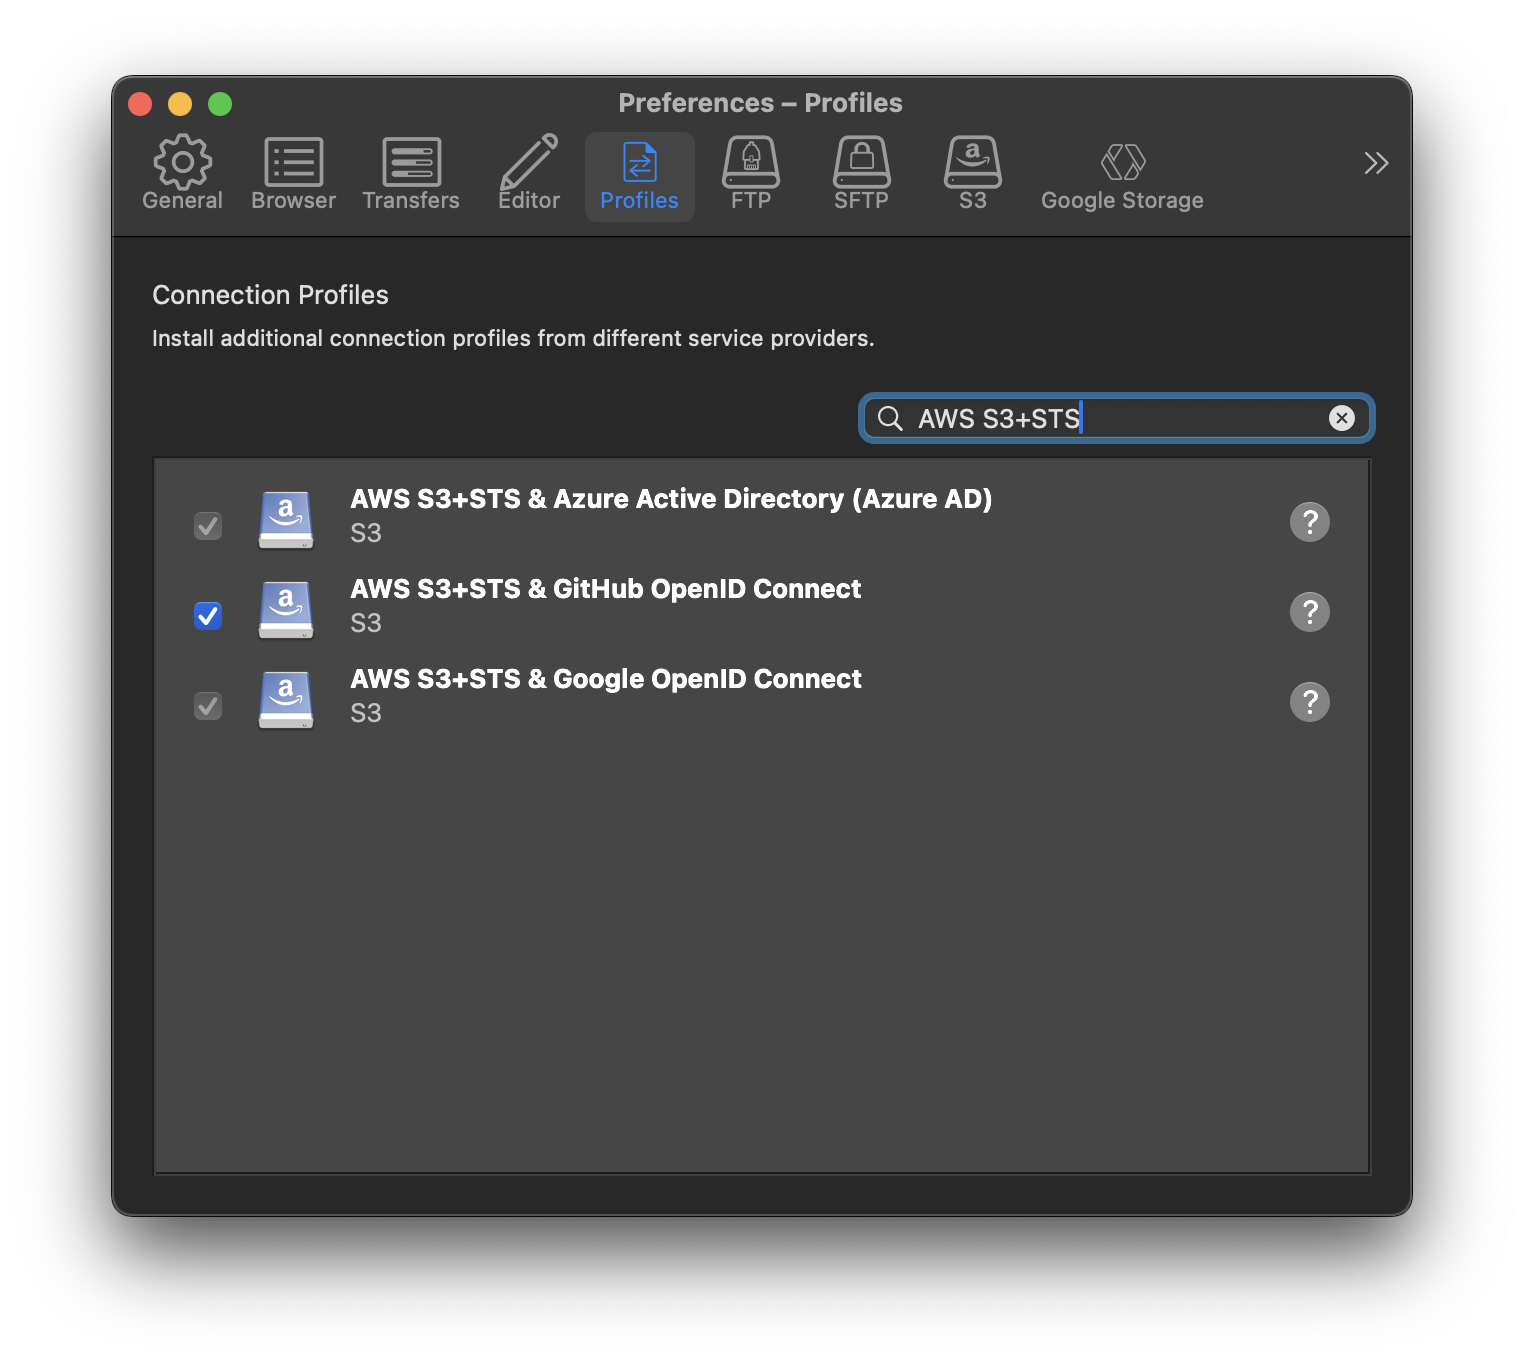
Default connection profiles for Google and Azure
Default connection profiles are provided to use Google or Azure AD as an identity provider in conjunction with AWS.
These default profiles will prompt users for the Role ARN configured in AWS IAM referencing the trust relationship configured with the identity provider. Assigned by AWS this has a format similar to arn:aws:iam::930717317329:role/my-role-name.
Configuration in AWS IAM
Add an identity provider in IAM. Refer to the documentation from AWS.
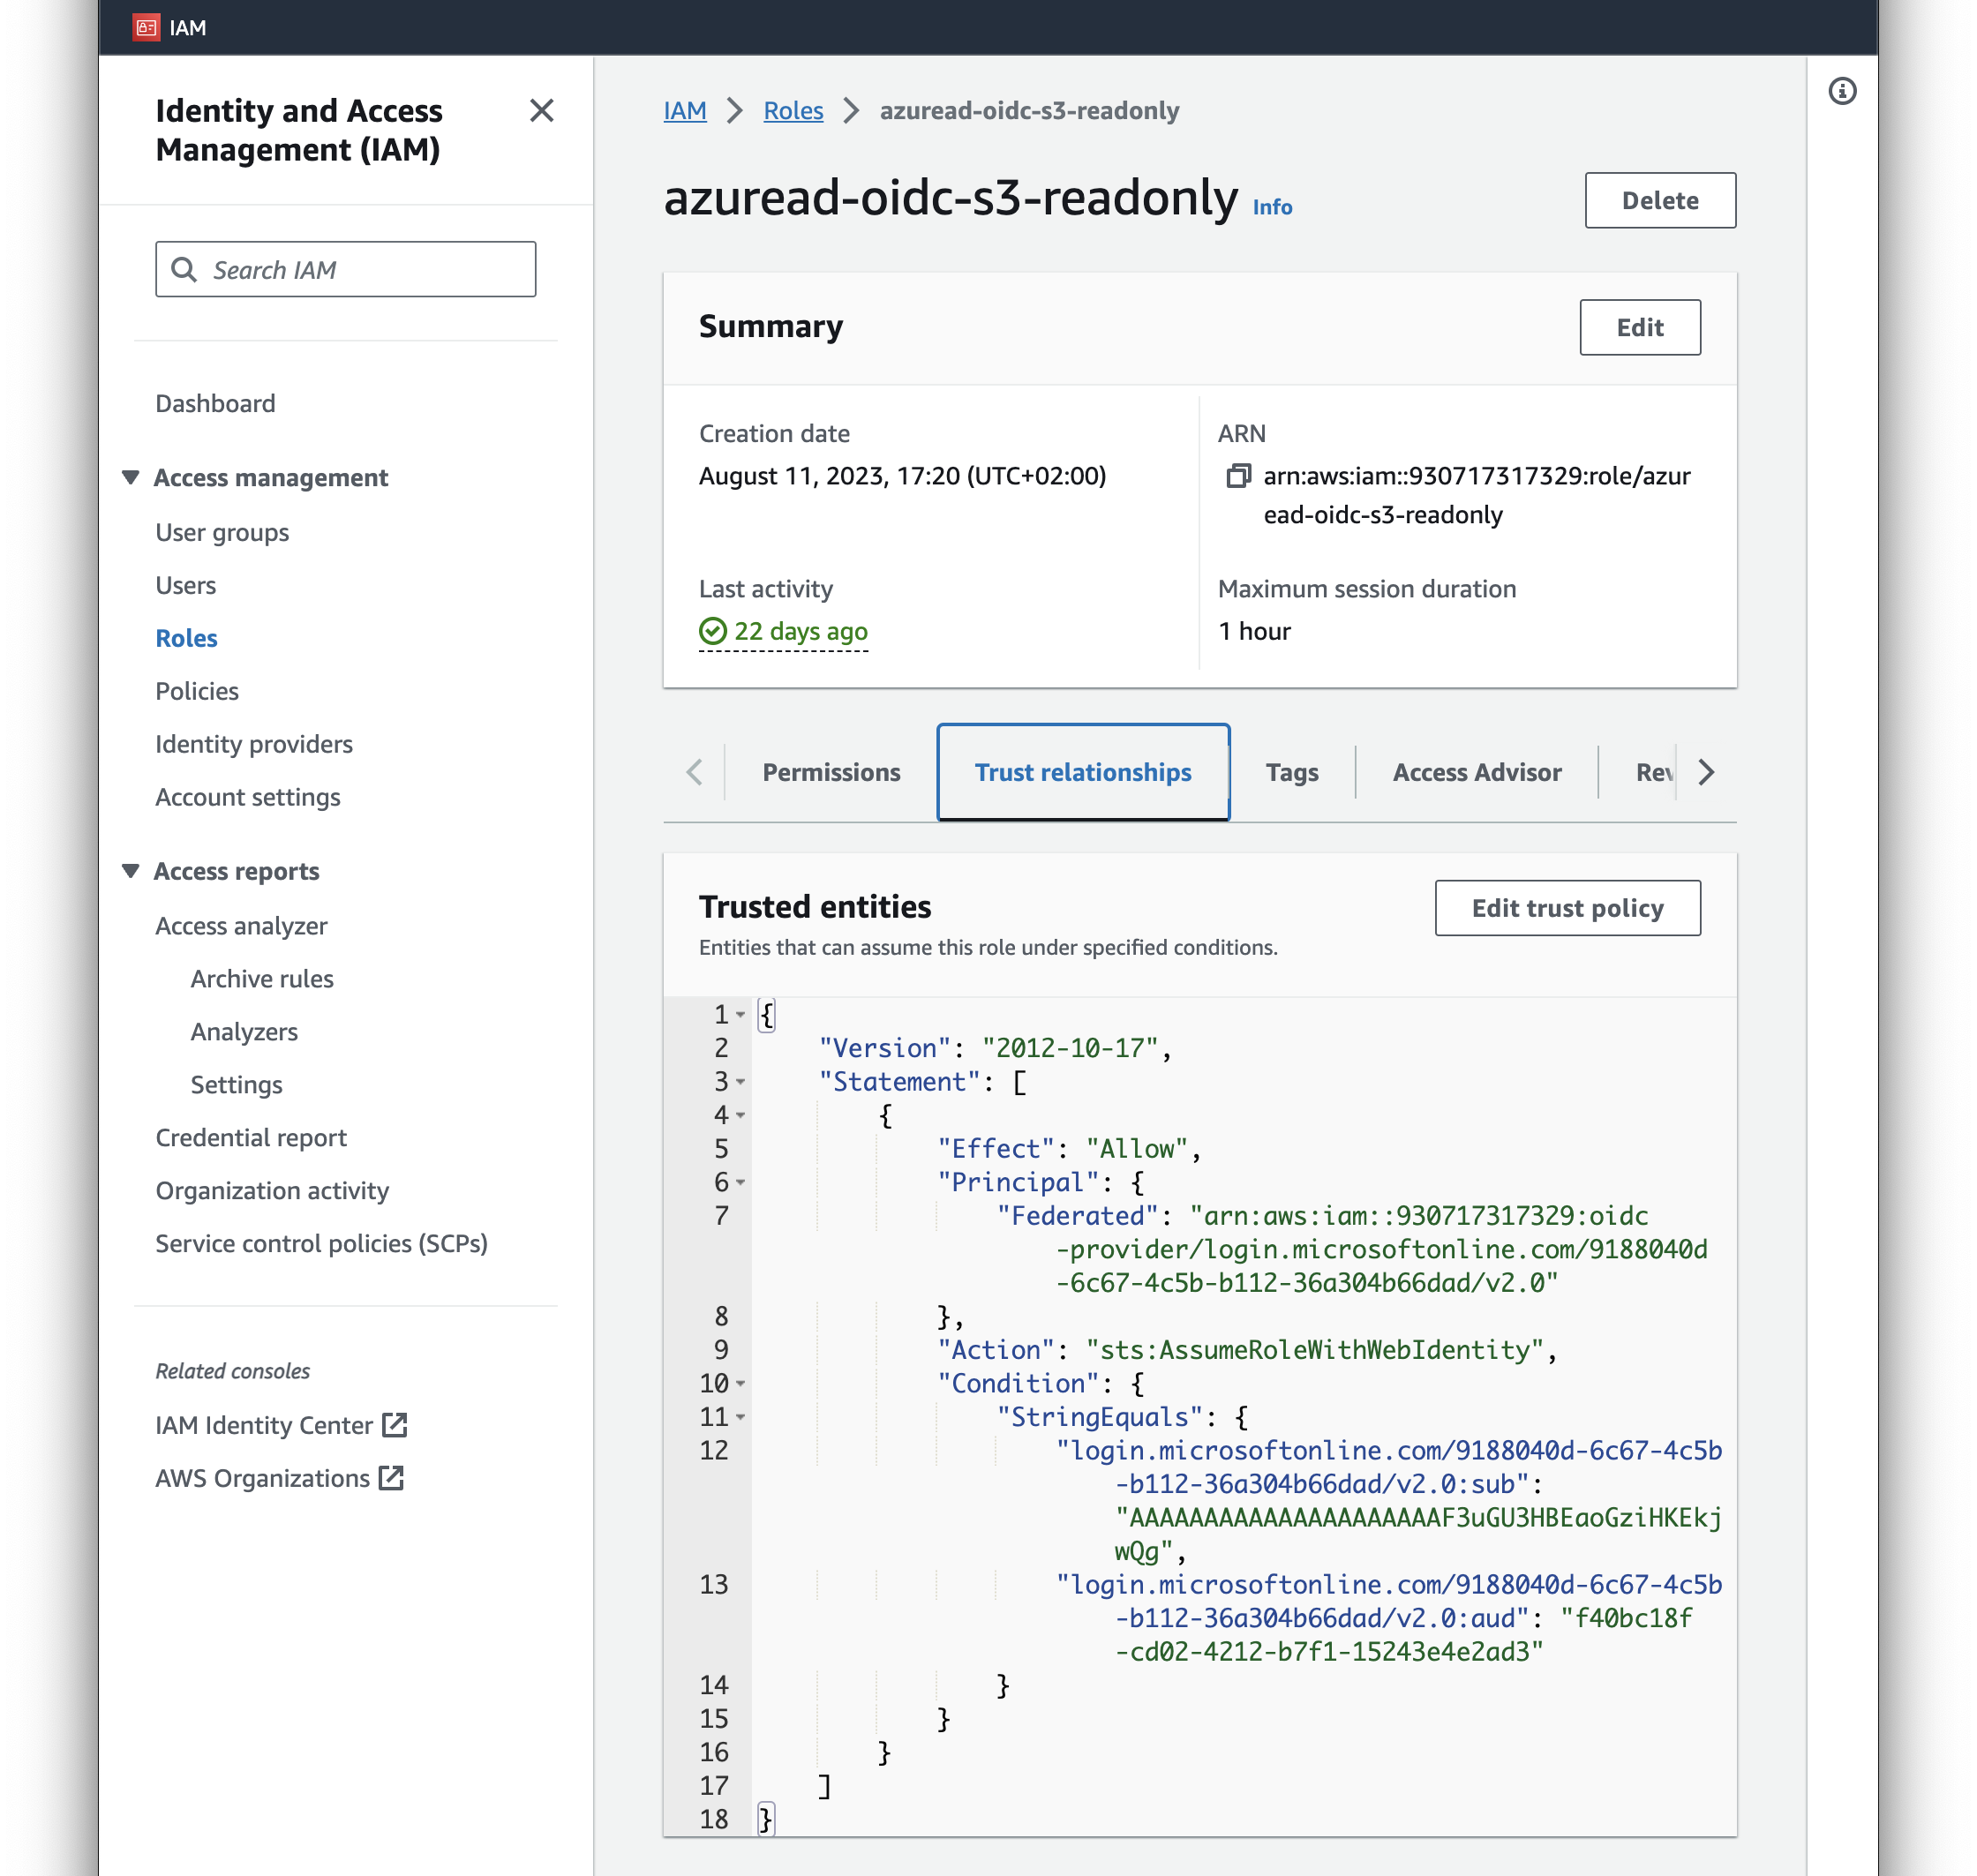
Assign a role. The role is crucial as it contains both the trust relationship with the identity provider and permission policy:
The trust policy restricts access to users authenticated with a specific identity provider and allows to filter for specific users in the Condition statement with access to the JSON Web Token (JWT) claims that can be matched.
With the permission policy attached it limits access to a predefined set of buckets or keys.
Refer to the AWS documentation on Creating a role for web identity or OpenID Connect Federation.
The role that your application assumes must trust the identity provider that is associated with the identity token. In other words, the identity provider must be specified in the role’s trust policy. The call to AssumeRoleWithWebIdentity should include the ARN of the role that is specific to the provider through which the user signed in.
Custom Integration
We have made available documentation to write your own connection profile for different combinations of S3/STS and identity provider such as MinIO S3 authenticating with MinIO STS and Keycloak (OIDC).
 Mountain Duck
 CLI
CLI